Tuesday, January 21, 2014

learning new things

I'm working away at a new design, the one which will include a bit of fabric and hand-sewing. Part of the pattern is based on some small toys I made for my friends as gifts. The knitting part of that is going well, since I had already made several. I just needed to work out a few different variations, to make the pattern more interesting. The other part of the pattern is a new idea, related to the first part by being done in the same yarns and variations (this will make way more sense when I have some photos to share). It's proving to be more of a challenge!

Often, when I'm working on a design that is similar to toys I've made before, everything comes together quickly and easily. At worst, I might have to try a few variations of the head and ears, to make sure the shaping (and/or intarsia) are just right. But when it's something really new, it doesn't always come out right the first time, or even the fifth! I try out different sizes, change the dimensions slightly, move around the increases and decreases. I'll may try out short-row shaping, or binding-off and casting-on new stitches. Occasionally, I'll try a different construction, as it may work better in 2 or more pieces. Sometimes, all these attempts to get the design just right end up making it too complicated, and I worry that knitters will decide not to bother with it. So I stick to some simpler, but less perfect version, telling myself, "It's good enough." And I move on, knowing that most knitters will be happy with the outcome, even if I will keep picking at it on my own.

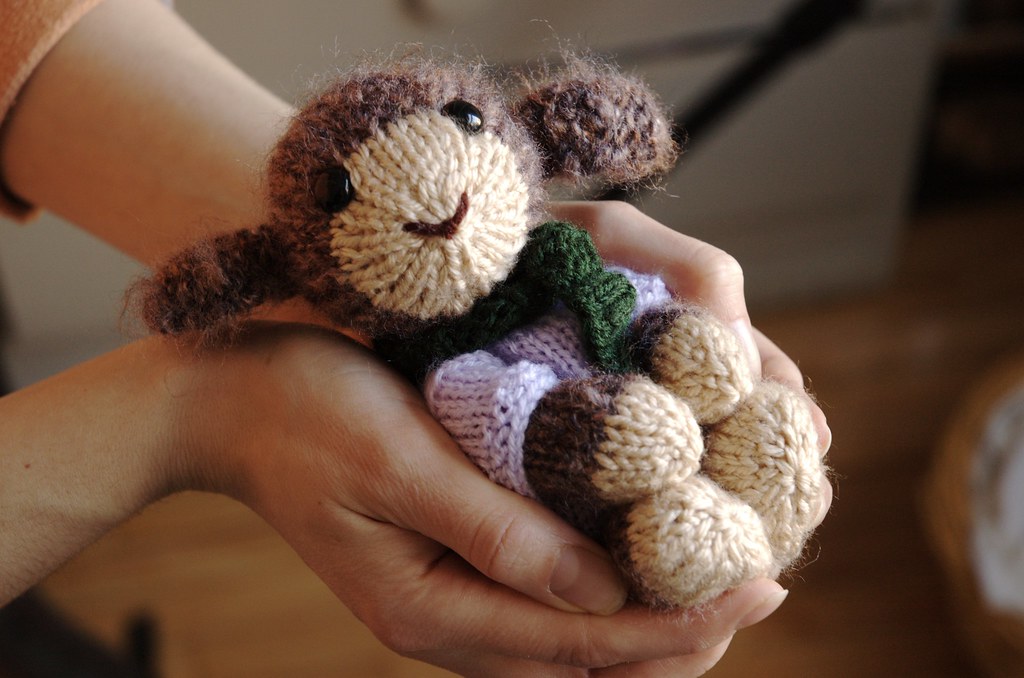
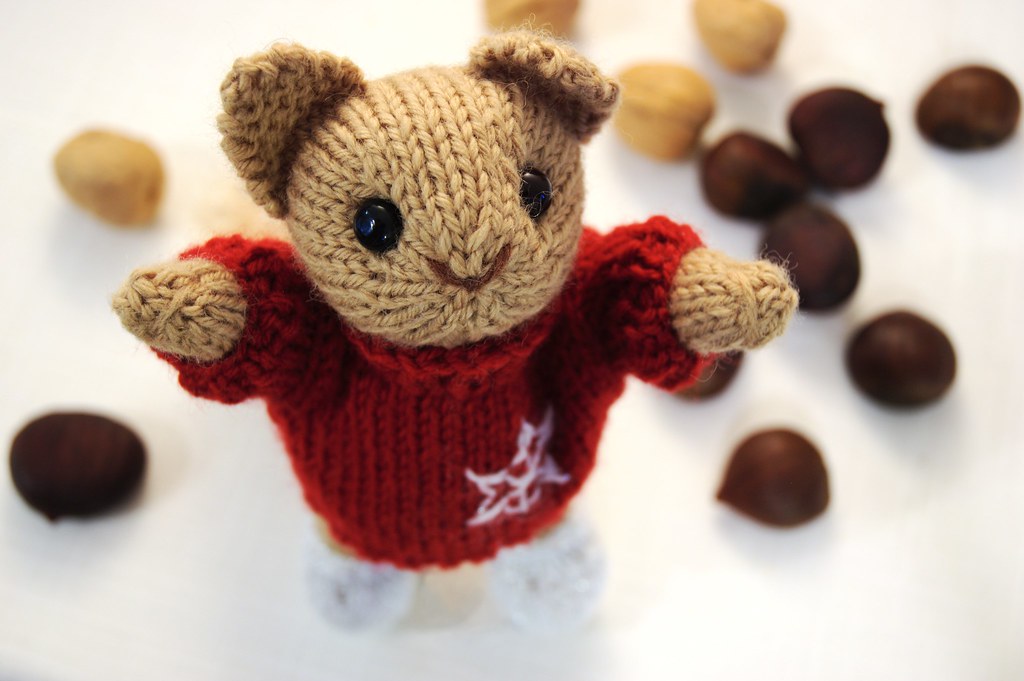
An example of a design in progress. 
The one on the right ended up being cut from the final pattern.

When I design something that I'm not 100% happy with, it always leaves me feeling like I want to learn more. Maybe if I knew a different stitch or technique, or had a better knowledge of how to shape a knitted fabric, I could design something just how I imagine it. Sadly, I can't often find the time to learn new skills, with so many important tasks filling up my days. When I can, I pick my personal knitting projects specifically to learn something new. But I don't always know exactly what it is I don't know!

Do you enjoy learning new skills and techniques, or do you prefer to stick to what you know and are good at? How do you prefer to learn new skills?

Friday, January 10, 2014

poll for potential new design

I have an idea for a new pattern, and I'd like to try something a little different. Anyone who has been reading here for a while knows that I also love sewing. In fact, I was sewing toys many years before I even learned how to knit! I would like to design a little toy that would also incorporate a bit of fabric, and some very basic hand-sewing. But before I get too excited about it, I want to make sure it's something you'd be interested in. I would likely also include a variation that wouldn't need the fabric and sewing, so don't worry if you've never sewn anything. Anyway, I'd appreciate your input, if you care to comment or vote in the poll on the sidebar (it will be open until Jan 17).

If I do end up going ahead with the design, I'll try to post progress reports (mostly in case I need a bit of help figuring out how best to write sewing instructions!)

Thursday, December 26, 2013

pumpkin chili

This recipe is based on a stew I threw together out of things I had at hand, but it turned out so well, I thought I ought to share it. I even made a second batch, to test the proportions and seasoning. The chili is thick, lightly spiced, and slightly sweet, and both my boys enjoy it (although that might be because I let them eat it with tortilla chips). The long version takes a bit of planning ahead, because you have to soak the beans over-night. However, both versions turn out equally well, making a tasty, inexpensive meal for cold and busy days.

Pumpkin Chili

(makes four large servings - I have a small slow cooker, but this could easily be doubled for a large cooker)


Ingredients
1 cup dried red kidney beans for slow version
1 ½ cups cooked red kidney beans for fast version

1 small (~1 lb) pumpkin/squash (buttercup or delicata work well)
1 large red pepper
1 medium carrot
1 stalk celery
1 small yellow onion
1 clove garlic
1 tbsp paprika
1 ½ tsp dried oregano
1 tsp ground coriander
½ tsp ground cumin
1 bay leaf
salt, pepper, chilli flakes to taste (only you know how spicy you like it)
2 tbsp olive oil
2-3 cups boiling water

sour cream and unsalted tortilla chips to serve

Note: I use a food processor to chop everything because it’s so much faster, and I like the fine texture of the finished chili. However, if you have a bit more time, you can dice everything by hand.

Slow version (7-8 hours cooking time)

Soak the beans overnight in 4 cups of water.
In the morning: Cut the squash in half and remove the seeds. Peel the squash, then cut into 1” chunks. Chop in a food processor until finely diced. You should have 2-2 ½ cups of diced pumpkin. Place in slow cooker.
Cut the red pepper into 2” pieces, then chop in the food processor until finely diced. Place in slow cooker.
Peel the carrot, and cut into 1” chunks. Cut the celery stalk into 1” lengths. Peel the onion, then cut into eighths. Peel the garlic clove. Place all of these in the food processor and chop until finely diced. Place in slow cooker.
Drain the beans, and add to the slow cooker. Add all the spices and oil (you can adjust the salt at the end, so don’t add too much). Stir, then add the water until everything is just covered.
Put the slow cooker on it’s low setting, and cook for 6-7 hours. For a thicker chili, you can turn up the cooker to high for the last hour, tilting the lid to allow steam to escape.

Serve with a spoon of sour-cream, and use the tortilla chips to scoop it up, or sprinkle with the broken bits from the bottom of the bag.


Fast version (4-5 hours cooking time)

About 5 hours before your meal: Cut the squash in half and remove the seeds. Peel the squash, then cut into 1” chunks. Chop in a food processor until finely diced. You should have 2-2 ½ cups of diced pumpkin. Place in a large frying pan with the oil.
Cut the red pepper into 2” pieces, then chop in the food processor until finely diced. Place in the frying pan.
Peel the carrot, and cut into 1” chunks. Cut the celery stalk into 1” lengths. Peel the onion, then cut into eighths. Peel the garlic clove. Place all of these in the food processor and chop until finely diced. Place in the frying pan.
Saute all the vegetables on medium heat for 10 minutes, adding the spices for the last minute.
Drain the beans, and put everything into the slow cooker. Stir, then add the water until everything is just covered.
Put the slow cooker on it’s high setting, and cook for 3-4 hours. For a thicker chili, during the next hour you can tilt the lid to allow steam to escape.

Serve with a spoon of sour-cream, and use the tortilla chips to scoop it up, or sprinkle with the broken bits from the bottom of the bag.


Tuesday, December 24, 2013

holiday crafting

While it's been nearly a month since my last post, and very quiet here, I've been super busy (as I'm sure many people are at this time of year)! The big project I've been working on can't be shared yet, but I've been knitting and sewing some other things in my spare time. Here's a little selection to inspire you, if you find your fingers need something to do over the holidays.


I knit this cardigan for my little niece, from this pattern. She's only 4 months old, so I scaled down the pattern by using DK weight yarn instead of worsted weight. It was easy and fun to knit, and I wish I had time to make more for my boys!


This beret was knit in just 2 days, because I had such a short deadline between the party invite and my friend's birthday. The hat turned out so well, I might knit another for myself.


The mini pookies I made for the pattern samples ended up on the tree in my boys' room. They were joined by some other soft and cute ornaments from my collection. For some reason, Kyr calls them all "piggies" so I knit a piggy one just for him (I just used pink for the head, and folded the fox ears).


I've also done a bit of sewing. The boys' stockings (on the right) I made last year. This year I found time to sew one for my husband and myself. I didn't use any pattern or tutorial for these, just making it up as I went along. I wanted to use up some of the scraps I had left from other projects, to make stockings that would suit each one of us, but still look like a set.


These matching pyjama pants I made for my boys from a piece of flannel that's been in my fabric stash forever. My method was very similar to this tutorial. If you've done a bit of sewing, this is such a rewarding project!

As a Christmas gift, I have a recipe to share with you tomorrow, something perfect for cold, busy winter days!

Wednesday, November 27, 2013

mini pookies ornament pattern

These Mini Pookies are super quick and easy to knit, using mostly basic knitting skills. The most challenging part is the shaped bobble that makes the nose of the Polar Bear and Arctic Fox, but there's only one per toy, and the stitches are useful to know. Since the idea of a sheep was also very popular, I decided to include that design too. The Sheep pookie is even easier to knit, and just as sweet. To make them extra special, I used some left-over bits of Blue Sky Alpacas' Royal Petites yarn. Since each toy only needs a few yards of yarn, they're perfect for using up tiny left-over bits, and totally worth the luxury of two little balls of extra nice yarn.

I hope you left an hour or two in your holiday knitting time to make some Mini Pookies to decorate your home, or pop into a lucky kid's stocking!

P.S. You can go here to download the PDF to take along with your knitting, or to send as a gift to a knitting friend.


Mini Pookies


Materials for one toy
5 g (about 15 m) of sport weight yarn in colour A, 7 g (about 20 m) of sport weight yarn in colour B, pair of 3 mm (US size 2.5) knitting needles, pair of 6 mm safety eyes, stuffing, black yarn to embroider the face, tapestry needle, 15 cm of cord for hanging (optional).
Gauge
7.5 sts and 10 rows per 2.5 cm (1”) in stockinette
Size
6 cm (2 ¼⁣ᐦ) tall


Notes
You could easily knit these in the round, if you prefer. Divide the stitches as evenly as possible between your double-pointed needles. Before working the final row of decreases, attach the safety eyes, weave in the yarn ends from the colour change, and stuff the toy. The ears must all be knit flat.


Polar Bear and Arctic Fox
Begin at bottom. CO 9 sts with yarn A.
Row 1: Knit.
Row 2: k1, [m1, k1] x 8. (17 sts)
Row 3: Knit.
Row 4: k1, [m1, k2] x 8. (25 sts)
Row 5: Knit.
Row 6: k1, [m1, k3] x 8. (33 sts)
Row 7-13: Beginning with a P row, work 7 rows in st st.
Row 14: k16, k2tog, k15. (32 sts)
Row 15-16: [k1, p1] to end.
Row 17: Knit.
Switch to yarn B on next row.
Row 18: ssk, k30. (31 sts)
Row 19: Purl.
Row 20: k15, increase 2 into next stitch (knit, purl, knit into stitch), turn. P3, turn. K1, m1, k1, m1, k1, turn. P5, turn. K5, turn. P5, turn. K1, s2kp, k1, turn. P3, turn. S2kp, k15. (this row makes a shaped bobble for the muzzle)
Row 21: p15, s1, p15.
Row 22: k15, s1, k15.
Row 23: p15, s1, p15.
Row 24-25: Work 2 rows in st st.
Row 26: [k1, k2tog] x 10, k1. (21 sts)
Row 27: Purl.
Row 28: [k2tog] x 10, k1. (11 sts)
Cut yarn, thread end through remaining stitches, and pull tight to gather. Put a tiny piece of stuffing inside the bobble, then carefully sew down the sides, knotting the yarn securely on the WS when you’re done. This makes the muzzle. Embroider a nose and mouth with black yarn. Attach the safety eyes. Gather together the cast-on stitches, then sew the back seam towards the head, leaving an opening. Stuff the toy, finish sewing the back seam, and weave in the yarn ends. Make a pair of ears.


Polar Bear Ear (make 2)
CO 13 sts with yarn B.
Row 1: K 1 row.
Row 2: [k1, ssk] x 2, k1, [k2tog, k1] x 2. (9 sts)
Row 3: K 1 row.
Row 4: [ssk] x 2, k1, [k2tog] x 2. (5 sts)
Cut yarn, thread end through remaining sts, pull tight to gather. Sew the ears to the head: the CO edge is the top edge of the ear. Curving the edge sewn to the head will give the ears a more realistic shape.


Arctic Fox Ear (make 2)
CO 15 sts with yarn B.
Row 1: Knit.
Row 2: k6, s2kp, k6. (13 sts)
Row 3: Knit.
Row 4: k5, s2kp, k5. (11 sts)
Row 5: Knit.
Row 6: [ssk] x 2, s2kp, [k2tog] x 2. (5 sts)
Cut yarn, thread end through remaining sts, pull tight to gather. Sew the ears to the head: the CO edge is the top edge of the ear. Curving the edge sewn to the head will give the ears a more realistic shape.


Sheep
Begin at bottom. CO 9 sts with yarn A.
Row 1-18: Work same as for Bear/Fox.
Row 19: k11, p9, k11.
Row 20: Knit.
Row 21-24: Work same as Rows 19-20.
Row 25: k12, p7, k12.
Row 26-27: Knit.
Row 28: [k1, k2tog] x 10, k1. (21 sts)
Row 29: Knit.
Row 30: [k2tog] x 10, k1. (11 sts)
Cut yarn, thread end through remaining stitches, and pull tight to gather. Attach the safety eyes. Gather together the cast-on stitches, then sew the back seam towards the head, leaving an opening. Stuff the toy, finish sewing the back seam, and weave in the yarn ends. Embroider a nose and mouth with black yarn. Make a pair of ears.


Sheep Ear (make 2)
CO 3 sts with yarn B.
Row 1: Knit.
Row 2: k1, m1, k1, m1, k1. (5 sts)
Row 3: Knit.
Row 4: k2, m1, k1, m1, k2. (7 sts)
Row 5-10: Knit in garter stitch.
Bind off. Fold the ear in half lengthwise, then sew together the bound-off edge. Sew this edge to the side of the Sheep’s head, with open side facing forward and folded side facing backward. Weave in yarn ends. Repeat for the second ear.


Hanging Loop (optional)
Thread cord for hanging under the gathered stitches on the top of the toy. Pull halfway through, then knot the two ends together.


Abbreviations
[ ] x N = repeat sequence in brackets N times ("to end" means to repeat until the end of the row)
CO = cast on
K or k = knit
k2tog = decrease 1 by knitting 2 together
m1 = increase 1 by picking up loop between stitch just worked and next stitch, and knit into the back of this loop
P or p = purl
RS = right side
s2kp = decrease 2 by slipping 2 stitches as if to k2tog, knit next stitch, then pass 2 slipped stitches over the one knit.
ssk = decrease 1 by slipping 2 stitches purl-wise, then knit slipped stitches together
st or sts = stitch or stitches
st st = stockinette stitch

WS = wrong side


Wednesday, November 13, 2013

holiday ornament poll

I'm beginning to design this year's free holiday ornament pattern. I've already decided on the basic style and shape, but it could be a variety of animals. I thought I would give my readers a chance to vote in a poll, so I can see which of my ideas would be most popular. If you have a moment, please vote in the poll over on the sidebar. Voting will be open until Nov. 20, but I may begin working on the design before that, since there isn't a lot of time left!

Thursday, October 31, 2013

7 years!

November 6 will mark the seventh anniversary of Fuzzy Mitten! I'm not sure how it's all lasted this long, but I'm so grateful that so many people enjoy my patterns - enough to keep me going longer than I ever expected, and hopefully for a few more years to come!


Did I ever explain how Fuzzy Mitten got started? I used to work as a gardener, at a garden center. However, being in Canada, I had a few months off over the winter. I was bored, so I started knitting little toys just for fun, and to use up bits of yarn I'd found. Each toy had it's own character, and it was very satisfying to see how many variations I could make on one basic shape. The clothes were a big part of the fun too. I'd only been knitting for a couple years, and hadn't tackled anything like clothes for myself. Tiny toy outfits were a great way to experiment with garment shapes, stitches, and yarn types.


A friend suggested I try selling the toys on Etsy, since they were just sitting around my apartment. It seemed like an interesting idea, and setting everything up, while challenging for someone who wasn't really internet savvy, was also a good use of spare time. (If you're curious about my shop name, you can read about it here). Within a couple weeks of listing my toys, knitters found them, and started asking for patterns. I was quite hesitant at first, because I didn't consider myself an experienced knitter, and certainly not qualified to be a designer.


But the interest was clear, and growing, so I thought I would try. I wrote out the instructions for all those first toys I had made: a polar bear, a squirrel, a tabby cat, a puppy, a lamb, and many others. The patterns were rough, and I needed help with a lot of things, but they were popular! By the middle of the next summer, I was so busy designing and running my Etsy shop, I realized I would have to cut back the hours at my regular gardening job if I wanted to keep Fuzzy Mitten going.


It hasn't always been an easy or smooth journey since that day, but I don't regret giving my business the chance to grow, and giving myself the chance to grow and change along with it. I've been given some great opportunities, met a lot of lovely knitters, and overall had a wonderful time designing cute toys for others to knit.


Now, as a treat for reading all of that, here is some lovely news: I'm having a sale in my Etsy shop and my Ravelry shop to celebrate it's 7th anniversary!

EDIT: The coupon code I'd posted earlier for Etsy was causing problems, so I've simply reduced the prices of all the items. I hope you enjoy trying some new patterns, or giving them as gifts to fellow knitters!
In my Ravlery shop, you'll get 20% off when you check-out.