Showing posts with label holidays. Show all posts

Friday, December 8, 2017

fancy collar accessory

Fancy Collar


This pattern makes a charming collar that can be attached to other garments such as cardigans or pullovers, to make them into a fancy holiday outfit, or it can simply be used as an accessory, to combine with multiple outfits. I’ve given two sizes of neck width, to make it easier to match to the garment of your choice.

It will save you time and confusion to read the entire pattern first, because there are several possible variations of this accessory. Reading everything will help you choose the options you need to achieve good results on your first try.

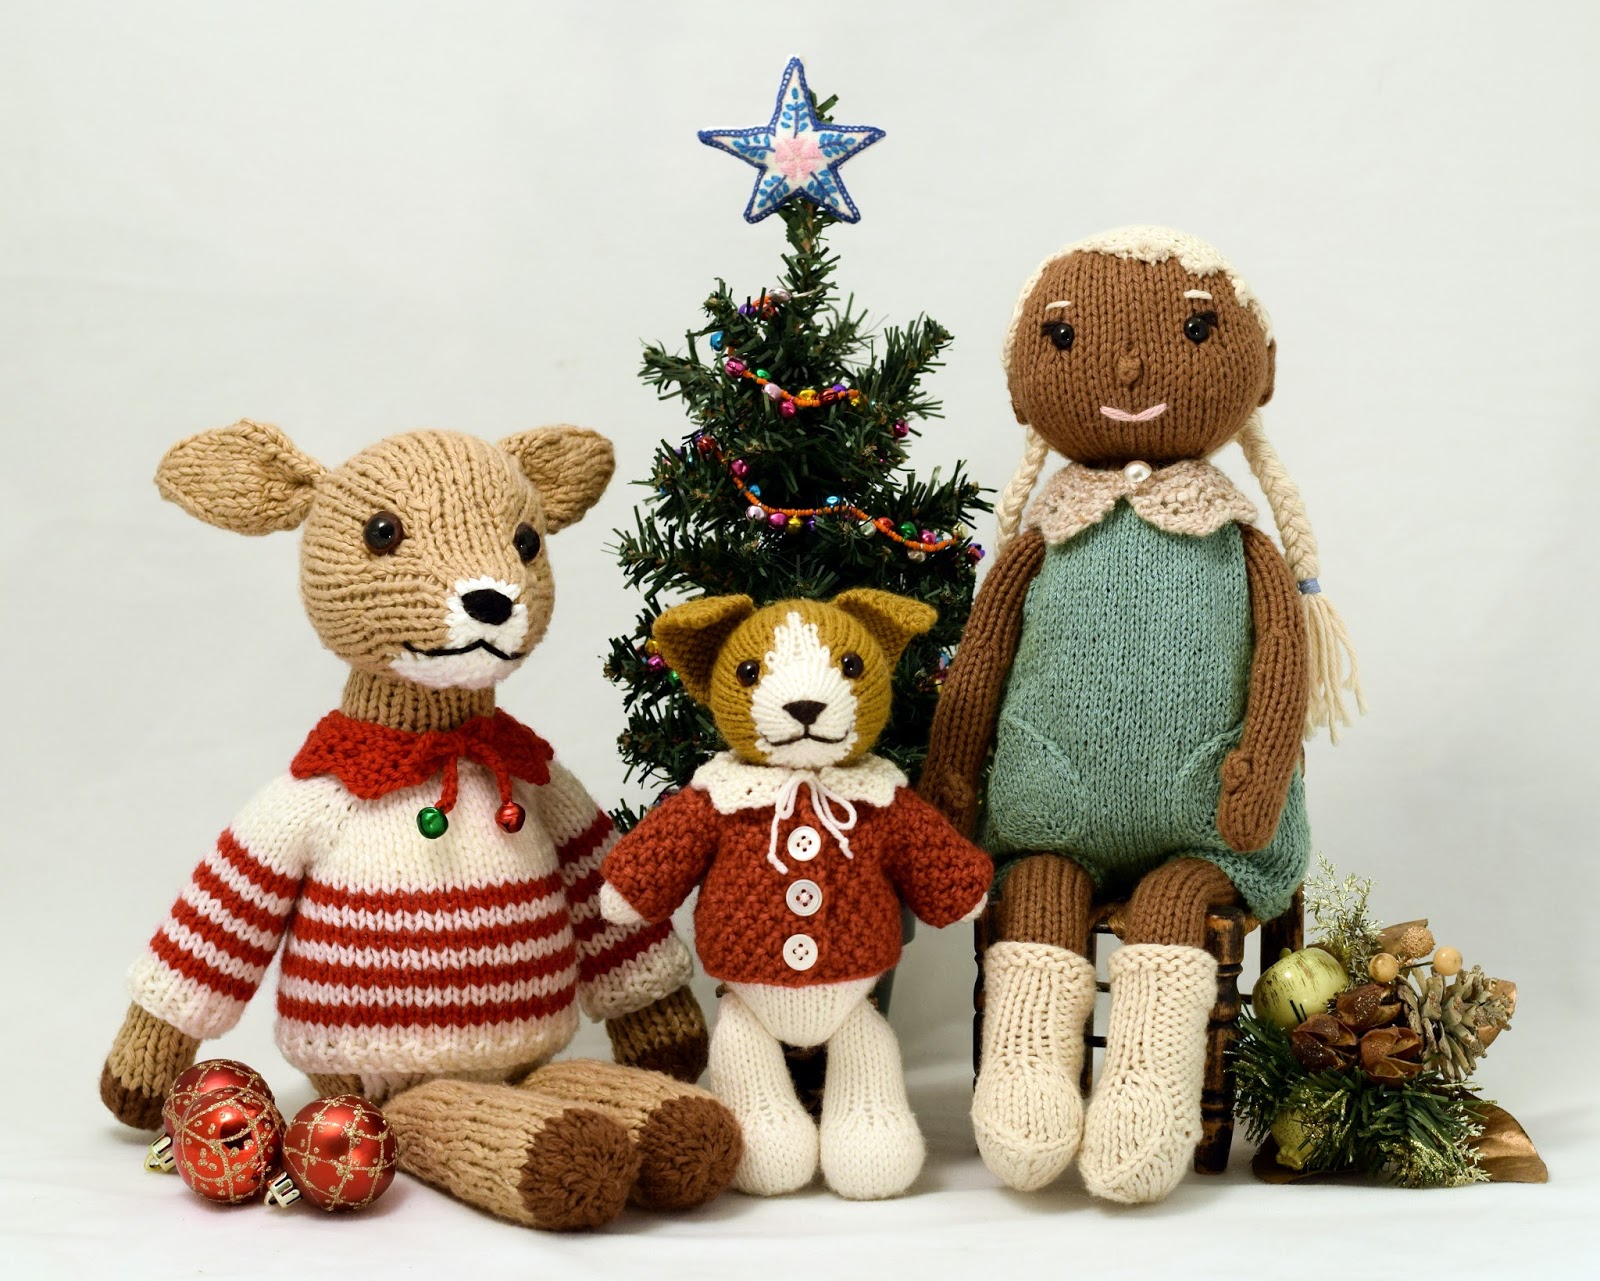
Left: size large with wide neck, knit with worsted weight yarn.
Middle: size medium with narrow neck, knit with DK weight yarn.
Right, size small with wide neck knit with fingering weight yarn.

Yarn and Notions
10-15 g of yarn in colour of your choice, a few straight or safety pins, narrow ribbon or extra yarn or button (plus needle and thread to attach) to join collar ends (optional), crochet hook (optional)
Needles: use a pair of straight needles in the size required for your toy/yarn (see below)
Size Small: with fingering weight yarn and 3 mm (US size 2.5) straight knitting needles, collar will fit my regular 8-9” tall toys
Size Medium: with sport or DK weight yarn and 3.5 mm (US size 4) straight knitting needles, collar will fit my Wood Elf Doll or 10-12” toys
Size Large: with worsted weight yarn and 4.5 mm (US size 7) straight knitting needles, collar will fit my large 12-16” toys

Note: For a non-lacy collar, you can work the yo stitches as m1; but, the collar will be less stretchy. 

Instructions
CO 52 sts.
Row 1 (WS): Knit.
Row 2: k1, [k1, yo, k1, ssk, k2tog, k1, yo] x 7, k2.
Row 3: k2, [k2, k2tog, k3] x 7, k1. (45 sts)
Row 4: k1, [k1, yo, k1, s1, k2tog, psso, k1, yo] x 7, k2.
Row 5: Knit.
Row 6: k1, [k2, ssk, k2] x 7, k2. (38 sts)
For wide-neck collar, bind off now.
For narrow-neck collar, work next 2 rows.
Row 7: Knit.
Row 8: k3, ssk, k8, ssk, k8, ssk, k8, ssk, k3. (34 sts)
Bind off.

Finishing
If attaching the collar to a cardigan, pin in place, matching ends at edges of button bands. Then use yarn ends to sew the inner edge of the collar to the collar of the cardigan. I used back-stitch, working through the edges of collar and cardigan, to get a tidy line of stitches on the inside. Weave in ends on WS of the collar.

Collar attached to neck of cardigan.
If attaching the collar to a pullover, stitch the collar to the garment at centre front and back, and each shoulder, but leave the rest of the collar loose. If you sew it on all the way around, it may be difficult to get over your toy’s head.


If using the collar as an accessory, choose one of the following methods to join collar ends at centre-front.
Button: For a collar that stays attached in front, simply match up top corners, and sew button on through both layers (the toy heads are squishy, so you should still be able to get it on). For a collar that can open, sew button to one corner. On opposite corner, make a button loop from a length of yarn, or crochet a button loop.
Button with a crocheted loop.
Ribbon or Yarn: Attach a 10 cm (4”) length of ribbon or yarn to each top front corner, or make single-crochet ties with extra yarn. For extra fun, attach beads or bells to the ends of the ties.

Single-crochet ties, with bells added to ends.

Abbreviations
[ ] x N = repeat sequence in brackets N times ("to end" means to repeat until the end of the row)
CO = cast on
K = knit
k2tog = decrease 1 by inserting needle from front to back into next 2 sts on left-hand needle, then knit together
m1 = increase 1 by picking up loop between stitch just worked and next stitch, from front to back, and knit into the back of this loop
P = purl
psso = pass slipped stitch over stitch just worked, to decrease 1 stitch
RS = right side
s1 = slip one stitch from left-hand needle to right-hand needle, making sure not to twist
ssk = decrease 1 by slipping 2 stitches purl-wise, slip back to left-hand needle, then knit slipped stitches together
st or sts = stitch or stitches
WS = wrong side
yo = yarn over: bring yarn forward, then over the needle to the back again. This makes a loop which can be worked as an extra stitch on the next row

Pattern links
Fudge the Dog, Cardigan from Polar Bear, Wood-Elf Doll, Deer from Backyard Bandits, Pullover from Breton Shore Outfit

Thursday, December 1, 2016

polar bear pouch

I have a new winter holiday pattern for you this year: a little knitted pouch, with a flap shaped as a polar bear face! This quick knit makes a sweet tree ornament, or it can be worn as a necklace. Hide a surprise or a treasure inside to make it extra special!
You need to know how to knit in the round, increase, decrease (ssk and k2tog), and make bobbles. An intermediate-level knitter should be able to knit and finish at least one of these in an evening. But don't be intimidated if you're more of a beginner: this project is so small, it's a great way to learn a new skill!

You will find the full pattern below, or download the PDF from Ravelry. Happy holiday knitting!

P.S. If this project is not your style, try one of my other free holiday patterns: Holiday Mice, Inuk and Seal, Reindeer finger-puppet, Mini Pookies. (Ravelry links: Holiday Mice, Inuk and Seal, Reindeer finger-puppet, and Mini Pookies.)


Saturday, November 21, 2015

holiday pattern round-up

Instead of a new holiday pattern this year, I wanted to share with you all the free patterns I've made in previous years. Perhaps you missed something in the past, your knitting skills have improved and you want to try new things, or you'd like to see an old project in a new way. Whatever the reason, I hope you find an hour or two to try out one of these adorable patterns. 

(Links are below, not on the individual photos)


From left to right, along to top row:

1. My most popular holiday pattern, these Mice are easy and quick to make. They can be toys to tuck into a stocking, tree ornaments, or even a gift topper. Knit them from bits of left over yarn, in any weight from fingering to worsted.

2. A close second, Mini Pookies are quirky and sweet. They're the perfect size for a Christmas tree, a child's hands, or even add a bit of cat-nip for your favourite kitty.

3. If you'd rather knit an accessory, this free hat pattern is easy and fast. Two 50 g balls of worsted yarn in your toddler's favourite colours, a few hours of knitting, and you'll have a toasty warm gift!

From left to right, along the bottom row:

4. If you know someone who loves pandas as much as my little boy, this toy is perfect. You can make a little pocket friend, or a finger puppet!

5. This reindeer finger-puppet is very similar to the panda, and more seasonal. If you don't mind a bit of hand-sewing, you can make the antlers from felt.

6: A special ornament set for those who love the North, this pattern makes an adorable baby seal and a little Inuk (person). Dress your Inuk in your favourite colours, and make the hair long or short. You can also have fun with a bit of embroidery on the coat.

And if these ideas are not enough, here's a few more:


7. One of my oldest patterns, these little stuffed trees are a great way to use up little bits of left-over yarn.

8. Have you wanted to try felting, and have some bits of wool yarn you're not using? Try making some felted star ornaments.

9. Finally, for those friends or relations who don't appreciate seasonal decorations, maybe you could knit some Mini Aliens!

For even more ideas, have a look at this similar post from Knitted Bliss.


Wednesday, November 27, 2013

mini pookies ornament pattern

These Mini Pookies are super quick and easy to knit, using mostly basic knitting skills. The most challenging part is the shaped bobble that makes the nose of the Polar Bear and Arctic Fox, but there's only one per toy, and the stitches are useful to know. Since the idea of a sheep was also very popular, I decided to include that design too. The Sheep pookie is even easier to knit, and just as sweet. To make them extra special, I used some left-over bits of Blue Sky Alpacas' Royal Petites yarn. Since each toy only needs a few yards of yarn, they're perfect for using up tiny left-over bits, and totally worth the luxury of two little balls of extra nice yarn.

I hope you left an hour or two in your holiday knitting time to make some Mini Pookies to decorate your home, or pop into a lucky kid's stocking!

P.S. You can go here to download the PDF to take along with your knitting, or to send as a gift to a knitting friend.


Mini Pookies


Materials for one toy
5 g (about 15 m) of sport weight yarn in colour A, 7 g (about 20 m) of sport weight yarn in colour B, pair of 3 mm (US size 2.5) knitting needles, pair of 6 mm safety eyes, stuffing, black yarn to embroider the face, tapestry needle, 15 cm of cord for hanging (optional).
Gauge
7.5 sts and 10 rows per 2.5 cm (1”) in stockinette
Size
6 cm (2 ¼⁣ᐦ) tall


Notes
You could easily knit these in the round, if you prefer. Divide the stitches as evenly as possible between your double-pointed needles. Before working the final row of decreases, attach the safety eyes, weave in the yarn ends from the colour change, and stuff the toy. The ears must all be knit flat.


Polar Bear and Arctic Fox
Begin at bottom. CO 9 sts with yarn A.
Row 1: Knit.
Row 2: k1, [m1, k1] x 8. (17 sts)
Row 3: Knit.
Row 4: k1, [m1, k2] x 8. (25 sts)
Row 5: Knit.
Row 6: k1, [m1, k3] x 8. (33 sts)
Row 7-13: Beginning with a P row, work 7 rows in st st.
Row 14: k16, k2tog, k15. (32 sts)
Row 15-16: [k1, p1] to end.
Row 17: Knit.
Switch to yarn B on next row.
Row 18: ssk, k30. (31 sts)
Row 19: Purl.
Row 20: k15, increase 2 into next stitch (knit, purl, knit into stitch), turn. P3, turn. K1, m1, k1, m1, k1, turn. P5, turn. K5, turn. P5, turn. K1, s2kp, k1, turn. P3, turn. S2kp, k15. (this row makes a shaped bobble for the muzzle)
Row 21: p15, s1, p15.
Row 22: k15, s1, k15.
Row 23: p15, s1, p15.
Row 24-25: Work 2 rows in st st.
Row 26: [k1, k2tog] x 10, k1. (21 sts)
Row 27: Purl.
Row 28: [k2tog] x 10, k1. (11 sts)
Cut yarn, thread end through remaining stitches, and pull tight to gather. Put a tiny piece of stuffing inside the bobble, then carefully sew down the sides, knotting the yarn securely on the WS when you’re done. This makes the muzzle. Embroider a nose and mouth with black yarn. Attach the safety eyes. Gather together the cast-on stitches, then sew the back seam towards the head, leaving an opening. Stuff the toy, finish sewing the back seam, and weave in the yarn ends. Make a pair of ears.


Polar Bear Ear (make 2)
CO 13 sts with yarn B.
Row 1: K 1 row.
Row 2: [k1, ssk] x 2, k1, [k2tog, k1] x 2. (9 sts)
Row 3: K 1 row.
Row 4: [ssk] x 2, k1, [k2tog] x 2. (5 sts)
Cut yarn, thread end through remaining sts, pull tight to gather. Sew the ears to the head: the CO edge is the top edge of the ear. Curving the edge sewn to the head will give the ears a more realistic shape.


Arctic Fox Ear (make 2)
CO 15 sts with yarn B.
Row 1: Knit.
Row 2: k6, s2kp, k6. (13 sts)
Row 3: Knit.
Row 4: k5, s2kp, k5. (11 sts)
Row 5: Knit.
Row 6: [ssk] x 2, s2kp, [k2tog] x 2. (5 sts)
Cut yarn, thread end through remaining sts, pull tight to gather. Sew the ears to the head: the CO edge is the top edge of the ear. Curving the edge sewn to the head will give the ears a more realistic shape.


Sheep
Begin at bottom. CO 9 sts with yarn A.
Row 1-18: Work same as for Bear/Fox.
Row 19: k11, p9, k11.
Row 20: Knit.
Row 21-24: Work same as Rows 19-20.
Row 25: k12, p7, k12.
Row 26-27: Knit.
Row 28: [k1, k2tog] x 10, k1. (21 sts)
Row 29: Knit.
Row 30: [k2tog] x 10, k1. (11 sts)
Cut yarn, thread end through remaining stitches, and pull tight to gather. Attach the safety eyes. Gather together the cast-on stitches, then sew the back seam towards the head, leaving an opening. Stuff the toy, finish sewing the back seam, and weave in the yarn ends. Embroider a nose and mouth with black yarn. Make a pair of ears.


Sheep Ear (make 2)
CO 3 sts with yarn B.
Row 1: Knit.
Row 2: k1, m1, k1, m1, k1. (5 sts)
Row 3: Knit.
Row 4: k2, m1, k1, m1, k2. (7 sts)
Row 5-10: Knit in garter stitch.
Bind off. Fold the ear in half lengthwise, then sew together the bound-off edge. Sew this edge to the side of the Sheep’s head, with open side facing forward and folded side facing backward. Weave in yarn ends. Repeat for the second ear.


Hanging Loop (optional)
Thread cord for hanging under the gathered stitches on the top of the toy. Pull halfway through, then knot the two ends together.


Abbreviations
[ ] x N = repeat sequence in brackets N times ("to end" means to repeat until the end of the row)
CO = cast on
K or k = knit
k2tog = decrease 1 by knitting 2 together
m1 = increase 1 by picking up loop between stitch just worked and next stitch, and knit into the back of this loop
P or p = purl
RS = right side
s2kp = decrease 2 by slipping 2 stitches as if to k2tog, knit next stitch, then pass 2 slipped stitches over the one knit.
ssk = decrease 1 by slipping 2 stitches purl-wise, then knit slipped stitches together
st or sts = stitch or stitches
st st = stockinette stitch

WS = wrong side


Wednesday, November 13, 2013

holiday ornament poll

I'm beginning to design this year's free holiday ornament pattern. I've already decided on the basic style and shape, but it could be a variety of animals. I thought I would give my readers a chance to vote in a poll, so I can see which of my ideas would be most popular. If you have a moment, please vote in the poll over on the sidebar. Voting will be open until Nov. 20, but I may begin working on the design before that, since there isn't a lot of time left!

Friday, November 23, 2012

inuk and baby seal

First I want to thank everyone who left a suggestion for the holiday pattern. They were all great ideas, and I definitely want to work on some of the others I didn't get to this year (especially the merry wombat! I tried, but it needs more work than I had time for). 

In the end, I decided on making the Eskimo, or Inuk, and a baby seal (which was suggested by Mr. Mitten when I couldn't get the merry wombat to turn out right). Below you'll find the instructions for both, with the abbreviations following, if you're unfamiliar with some of the terms. I hope to get the pattern published as a PDF as soon as Mr. Mitten has time to help.


I've tried to design these toys to be simple and fast, so you can make a set in an evening. I've designed them in worsted weight yarn because I always have lots around, but you can easily knit them in a different weight with appropriate sized needles. (Note: changing to finer yarn will make the toys appear slimmer, changing to thicker yarn will make the toys appear plumper). The pattern is advanced beginner to intermediate level, and you will need to know how to knit, purl, increase, decrease, change yarns, make bobbles, work I-cord, and sew seams. However, these all make the toys fun and interesting to knit, and small toys are a great way to learn new skills!

Materials
Inuk: 15 g of worsted weight yarn in main colour (MC), 5 g of worsted weight yarn in light brown, 5 g of worsted weight yarn in black, 5 g of fuzzy or eyelash yarn, pair of 4 mm (US size 6) knitting needles, two 4 mm double pointed needles, pair of 6 mm safety eyes, stuffing, length of ribbon or cord for hanging, tapestry needle
Baby Seal: 15 g of worsted weight yarn in cream, black yarn to embroider face, pair of 4 mm (US size 6) knitting needles, pair of 6 mm safety eyes, stuffing, length of ribbon or cord for hanging, tapestry needle

Gauge: 4.5 sts per 2.5 cm (1 inch) in stockinette

Size: 7.5 cm (3 inches)

Inuk
CO 9 sts with MC.
Row 1: P 1 row.
Row 2: k2, [m1, k1] x 7. (16 sts)
Row 3: P 1 row.
Row 4: k2, [m1, k2] x 7. (23 sts)
Row 5: P 1 row.
Switch to fuzzy yarn on next row.
Row 6: k2, [m1, k3] x 7. (30 sts)
Row 7-9: K 3 rows.
Switch back to MC yarn on next row.
Row 10-11: Beginning with a k row, work 2 rows in st st.
Row 12: k3, [k2tog, k4] x 2, [k4, ssk] x 2, k3. (26 sts)
Row 13: P 1 row.
Row 14: k3, [k2tog, k3] x 2, [k3, ssk] x 2, k3. (22 sts)
Row 15: P 1 row.
Row 16: k6, mb, k8, mb, k6.
Row 17: P 1 row.
On next row, switch to light brown yarn.
Row 18: k5, k2tog, k8, ssk, k5. (20 sts)
Row 19-21: Work 3 rows in st st.
On next row, switch to black yarn.
Row 22-23: Work 2 rows in st st.
Row 24: k1, [k1, k2tog] x 6, k1. (14 sts)
Row 25: P 1 row.
Row 26: k1, [k2tog] 6 times, k1. (8 sts)
Cut yarn leaving a long end, thread end through remaining stitches and pull tight to gather.
Attach safety eyes. Sew back seam down to garter-stitch section. Stuff body. Thread yarn through cast-on stitches, gather, then sew last bit of seam. Weave in yarn ends. You may need to make a couple small stitches around bobble arms to close any holes. Embroider a face and hands. For a girl, add braids for hair. These embellishments can be as simple or as creative as you like.

Hood
Start at front. CO 16 sts with fuzzy yarn.
Row 1-3: Knit 3 rows in garter stitch.
On next row, switch to MC yarn.
Row 4-5: Beginning with a k row, work 2 rows in st st.
Row 6: k5, k2tog, k2, ssk, k5. (14 sts)
Row 7: P 1 row.
Row 8: k4, k2tog, k2, ssk, k4. (12 sts)
Row 9: P 1 row.

Row 10: k3, k2tog, k2, ssk, k3. (10 sts) Bind off, or graft back of hood together. If you bound-off, sew a vertical seam at the back of the hood. Weave in yarn ends. Sew bottom edge of hood to toy, just below the neck. If you are hanging the toy, thread the ribbon or cord through the top of the hood, and tie a knot. 

Legs (make 2)
CO 5 sts with MC yarn onto one double pointed needle. Work I-cord for 4 rounds. Bind off. Sew
the bound-off edge of legs to bottom of Inuk. Weave in all yarn ends.


Baby Seal
Start at tail. CO 6 sts with cream yarn.
Row 1: P 1 row.
Row 2: k2, [m1, k1] x 4. (10 sts)
Row 3-5: work 3 rows in st st.
Row 6: k2, [m1, k2] x 4. (14 sts)
Row 7: P 1 row.
Row 8: k2, [m1, k2] x 6. (20 sts)
Row 9-13: work 5 rows in st st.
Row 14: k9, m1, k2, m1, k9. (22 sts)
Row 15: P 1 row.
Row 16: k1, k2tog, k7, m1, k2, m1, k7, ssk, k1.
Row 17: P 1 row.
Row 18: [k1, k2tog] x 3, k4, [ssk, k1] x 3. (16 sts)
Row 19-23: work 5 rows in st st.
Row 24: k1, [k2tog] x 3, k2, [ssk] x 3, k1. (10 sts)
Row 25: P 1 row.
Cut yarn leaving a long end, thread end through remaining stitches and pull tight to gather. This is the nose end. Insert safety eyes on head. Sew up seam along underside of body, leaving an opening. Stuff and sew closed. Most of the head shaping is done with the stuffing, adding extra bits to the cheeks and nose. You can also try some soft sculpture for more definition (although baby seals are really cute cute fuzzy blobs!) If you are hanging the toy, thread the ribbon or cord through the back of the neck, and tie a knot.

Flippers (make 4)
CO 8 sts.
Row 1: k6, k2tog. (7 sts)
Row 2: K 1 row.
Row 3: k5, k2tog. (6 sts)
Row 4: K 1 row.
Row 5: k4, k2tog. (5 sts)
Bind off. Fold in half lengthwise and sew together short straight edge. 

Sew 2 flippers to tail, with decreased edges facing out, and cast-on edges facing toward the head. Sew other 2 flippers to sides of body near the head, in the same orientation as the tail. Weave in yarn ends.


Abbreviations
[ ] x N = repeat sequence in brackets N times ("to end" means to repeat until the end of the row)
CO = cast on
K or k = knit
k2tog = decrease 1 by knitting 2 together
k3tog = knit 3 together, same technique as k2tog
kfbf = increase 2 by knitting into front, then back, then front of next stitch
m1 = increase 1 by picking up loop between stitch just worked and next stitch, and knit into the back of this loop
mb = make bobble: kfbf, turn, p3, turn, k3, turn, p3, turn, k3tog. You should start and end with 1 st.
(there are many ways to make bobbles. If you need help, search for a tutorial that makes sense to you)
P or p = purl
p2tog = decrease 1 by purling 2 stitches together
ssk = decrease 1 by slipping 2 stitches as if to purl, transfer slipped stitches back to left needle, then knit slipped sts together
st or sts = stitch or stitches
st st = stocking stitch

Wednesday, November 21, 2012

happy holidays sale

Do you still have time to fit in one or two little holiday knitting projects? Of course you do! Or perhaps you'd like to gift a pattern to someone who likes to knit cute toys? Starting November 22 and running until November 30 (eastern time in Canada), there will be a Happy Holidays Sale in my Ravelry shop!


Use the coupon code "happyholidays" to get 20% off the following holiday patterns:
Baby Penguin
Cozy Elf Tuque
Festive Knits (ebook)
Macaroni Penguin
Polar Bear
Santa Reindeer
Surfer Koala (for my friends in the Southern hemisphere)


But even if you decide not to use the coupon, I have a new holiday pattern for you which should be ready very soon!


Friday, August 24, 2012

portland

I've been in Portland, Oregon, since Monday evening. My husband is here on business, and I got to tag along because my wonderful parents were willing to watch the kids. While I do miss my boys, it's been great having a few days to myself in such an interesting city. I've been shown around by a native of the city, had breakfast with one of my favourite bloggers, been to some beautiful gardens, seen a childhood friend whom I didn't even know was living here, bought yarn and fabric, visited the Oregon Zoo, had some great coffee, and eaten some delicious food. (I'm not going to provide links for everything I did, since I saw only a tiny part of the city. If you want ideas, please see this excellent list).


I return to my parent's place in BC tomorrow, and in just a few days we fly back to Montreal. I miss home so much, and our busy lives will restart in a big hurry once we get there. I think it's going to be a great Autumn, and I hope you come back here to see what we're up to.

Tuesday, July 3, 2012

headed out west

Tomorrow morning we head out west to spend the summer with my family. A little town in the mountains of South-Eastern British Columbia, where my parents, grandma, and three of my siblings live. We're looking forward to sunny days playing outside, long hikes in the mountains, swimming in the lake, and visits with family. My husband and I are also taking a little side trip to Portland, Oregon. He has to go for work, and I get a few days on my own. I'm really looking forward to exploring yarn shops, books stores, and whatever else takes my fancy.

I'm not sure how much I'll be able to post here, but I'll try to share a photo now and then, so you can see how much fun we're having!

I also thought I would host a little give-away, to share the fun with you. I'll pick up some little souvenirs while we're in BC, so the give-away will be a surprise. If you'd like to join in, just leave a comment here. An email address helps a lot too (in my last give-away, 2 winners never got their prize because I couldn't get in contact with them). I'll choose the winner (or winners) at the end of July.

I hope you all have a beautiful summer full of adventures, and maybe just a little knitting!

Tuesday, June 26, 2012

summer vacation sale

We're headed out west next week, to spend the summer with my family! Mountains, lakes, forests, small towns, cousins, grandparents, and all kinds of other good things. My 3-year old asks about 20 times a day how soon we're leaving. I'm looking forward to actually being there. Getting ready to go is another matter! Thank goodness we have lovely friends house-sitting for us, so there's a lot less to worry about (like poor lonely kitties).


As a little summer treat for you, my lovely knitters, I'm having a sale in my Ravelry shop. The sale starts June 27 and runs until July 11. You'll get 15% off all my single patterns, and 10% off both my ebooks. No coupon code, and no minimum purchase required (just to make things simpler for all of us). Why not pick a summery pattern, like the Alpaca with Bikini or Surfer Koala? Or if you've done these already, knit summer outfits for your other toys! You could also try using a soft cotton yarn for more comfortable knitting in summer weather. I've been knitting up a bunch of Wee Wuzzies for gifts in un-dyed organic cotton. You can get all kinds of colours which are perfect for little animals (I've used this one, and really like it).


Before we leave, I have a couple blog posts I'd like to get written. A small modification on the Pookies to make another cute animal, and I've just had a fun idea for a give-away. So check back soon!

Friday, November 19, 2010

snowflake design

I'm doing something a little different this year for my free holiday pattern. Instead of posting one pattern for an ornament or toy, I'll be giving you holiday-themed colour-work and intarsia designs which you can incorporate into various clothing patterns. I will try to post one each week, for as long as I can think of cute ideas.

This week is a traditional snowflake pattern. I've sized this design to fit easily onto a variety of my pullover patterns (such as this or this, and it's already found in Festive Knits), so you can use whichever you already have. The sample in the photo below has been knit into the pullover from the Pupster pattern (the only change being garter stitch hem and cuffs instead of seed stitch).


The snowflake design is 17 stitches wide by 17 rows long (see chart below), so you will first need to figure out the width and length of the pullover front, then you can center the design. I found the snowflake turned out much nicer if worked in fair-isle, rather than intarsia, but use whichever technique you are most comfortable with. (for a video of both techniques, look here - just scroll down half-way to find the right video).


I hope you enjoy this design, and look forward to next week's free pattern!

EDIT (Nov. 21): I know some of you have been trying to copy and save, or print the chart. Unfortunately, the site I used does not allow these options right now. You can only view the chart here on my blog.  I thought I would try out the site, as it's much faster and simpler than drawing my own from scratch. I will look into other options for future blog posts.

Wednesday, November 17, 2010

holiday sale updates

A few things today:

You know what, we'd really like you to have our books -- they make very nice presents! This is why between now and Christmas the printed versions of both "Fuzzy Knits" and "Festive Knits" are 25% off on Lulu.

I'm hoping to have a new hat pattern to release soon, maybe by the end of the week? I should be able to get the rest of the photos today, and then it just needs formatting (really wish that publishing software was easier to use). Like the books, I will probably offer it for a special sale price for the holidays, so save a little time in your knitting schedule!

I plan to have a big Etsy shop update of gift items next week. I have several toys to list, and plan to sew a few zip pouches. I'm also thinking of making kits for gift-giving. These would be for my Holiday Mice pattern, and would include yarn, stuffing, and notions for 2 mice, plus the printed pattern. A rough price estimate is about $10-12 US, plus shipping. Is this something many of you would be interested in?

Friday, October 29, 2010

happy halloween!

Brindle Bat wanted to stop by quickly to say, "Happy Halloween!" (she's knit from my Bat pattern - Rav link). I hope you all have a fun and spooky weekend!


Things have been a little quiet around here lately for a few reasons, but I should very soon have more time for thinking up fun and cute ideas for you! Lev is starting preschool next week - 2 days a week at a Montessori school. We hope this will give him the opportunity to socialize with other kids and adults, and learn a little too. It will also give me some much needed time to spend on Fuzzymitten stuff, which has been sadly neglected for too long.

I've missed blogging about knitting and all the other things I do (which you seem to enjoy reading about). I'm going to concentrate on thinking up some fun and useful items to post here leading up to the holiday season. There's at least one tutorial I've been meaning to get to for months...

One thing I can tell you about is a new hat pattern for kids and adults. I've been updating about that over on Facebook and Twitter. I have no photos yet, but it's a fairly simple and cute pattern that works for girls and boys of many ages. It should be ready sometime in November (I just need to get off the computer and actually knit the other 2 sizes).

That's all for now. Thanks for hanging out!

Friday, May 7, 2010

mama day give-away

I was chatting with my girl-friends the other day about mothers and mothers' day (which is this Sunday in Canada). Throughout the conversation, I kept remembering little stories about all the cute or funny things Lev has done lately. One of my friends exclaimed, "Now I get why people have kids! They're lots of fun!" It's true that some parts have been difficult, frustrating, exhausting, and even scary (especially when he started climbing things) - and he's only a year and a half! But I believe I have laughed more in that time than I have since I was a kid. I love him to pieces, and I'm so lucky to be his Mama (or Mam, as he calls me).

Reading with my mom. I'm in the purple PJ's, and about 6 years old.

Sadly, I've forgotten to send my Mom anything, but hopefully a long phone-call will help. We don't talk as much as I'd like, since she works odd hours, and there's a 3 hour time difference between us. One of the things I love most about my Mom is all the things she taught me over the years. Reading first, then sewing and embroidery, plus cooking and baking. She was also my Girl Guide leader, and was always challenging me to learn more about all kinds of things there. I wish I'd nagged her more to teach me knitting, as I wonder how far ahead I would be with another 15-20 years experience, but at least it's now a hobby we can enjoy together.

Taken with the camera on my laptop, about a month ago.

We haven't made any plans to celebrate Mother's Day in our little family, but I think a trip to a greenhouse for plants to fill my flower boxes would be just right (wink wink). To continue my earlier story, I came home from visiting my friends, to discover Mr. Mitten working on a super special gift for me (he has a little talent that he doesn't practice enough). I was so surprised and overwhelmed I got a little teary. Maybe he'll let me share the drawing once he's finished.


To celebrate Mothers everywhere, the things they teach us, and the laughter they share with us, I'm running a little give-away. You just need to leave a brief comment sharing something you love about your Mother, or about being a Mother. On Sunday morning (May 9), I'll draw some names, and the winners will receive a free pattern of their choice*.  It will help if you leave your email address or Ravelry name with your comment, but if you don't want to do that, check back here to see if you won.

*If you happen to have all the patterns you'd like, I'd happily send the free pattern as a gift to whomever you choose.

Saturday, February 13, 2010

happy valentine's day!

Need a last minute Valentine idea? You can print these out on heavy paper, then cut out the individual cards with fancy scissors, and there's lots of room on the back to address one to your sweetheart! Just download the largest size image for the best results.

Of course, you don't need a sweetheart to have a happy Valentine's Day! I like to take this opportunity to show all the people I care about how much they mean to me - family and friends who are special and deserve gratitude for everything they do all year long (I'm just lucky to have two big sweethearts to share the day with, as well).

Knitting time has been pretty scarce around here this week, as Munchkin Mitten was sick with a cold. I'm hoping to try out my new light tent this weekend, so maybe I will have a few photos to share next week. And if your in the mood for Spring bunnies and lambs, there's lots of action over on Ravelry! The knit-a-long is going for anther 5 weeks, so there's plenty of time to join!

Tuesday, December 29, 2009

holiday sale

I just had a sudden inspiration to offer you a surprise New Year's sale! Until January 7th, my Well Dressed Bunny pattern, as well as Clothing Bundles 1, 2, and 3 are all $2 off! Those links are to my Lulu store, but you can also find all those patterns on Etsy, and the Well Dressed Bunny on Ravelry. Happy knitting!

(Edit: the listed prices have been changed to the sale price, so you don't need to worry about sale codes or anything like that)


I hope you are all enjoying the holidays, and maybe even a well-deserved break from work (I know I am). We had a good visit with our house-guest last week, and even managed to get out to see a movie thanks to free babysitting. This week should be a little more laid-back without any holiday preparations to worry about. Although, we are officially on a diet from all the sweets and rich food (we might make an exception for New Year's eve celebrations). Lev is enjoying the new toys and books he received from relatives. We got him a shiny red sled, but he wasn't very happy in it the first time we took him out. Hopefully we get some fresh snow and less-cold weather this week, so we can try again.

I have completely failed at getting any photos, though I intend to try a little harder this week. It's just so discouraging when our house isn't very sunny (especially in winter) and I find our camera too clunky and heavy for fun snaps. The only photos we have are some portraits of Lev, which we took to send out to our families. Hopefully this goofy smile makes up for the lack of other photos!