Showing posts with label freepatterns. Show all posts

Monday, November 26, 2018

silky seal pattern

I have a new pattern available for the holidays: a sweet, cuddly seal toy! A slightly different version of this pattern was published a couple years ago, but I've updated it, and you can get it for free until the end of the year (December 31, 2018).


The original toy was knit with Berroco Modern Cotton (in colour 1623), which my 7-year old tells me is very soft and snugly. He's added the toy to the menagerie on his bed, and I regularly find the seal tucked under his chin in the morning. For the second toy, I wanted to try making a smaller size with DK weight yarn, because I know this weight is more common than worsted in some places. I improvised with yarn from my stash, holding together one strand of wool/arcylic sport weight yarn, with one strand of mohair/silk lace yarn. The result gives a lovely soft halo, and both yarns are relatively easy to find in most yarn shops. If you can find a fuzzy DK yarn, even easier for you!


While the head and body are fairly easy to knit, the flippers require some concentration. They are small, though, and quickly accomplished. The sewing-up may test your skills a bit, but a fuzzy yarn is especially forgiving of slightly messy seams. Make your seal extra adorable with oversized black safety eyes! Once the pieces are finished, the final toy comes together quickly, with only the head and front flippers to attach. For an extra cozy seal, you can add a little scarf cut from felt, or knit one from the instructions below. This isn't shown in the pattern photos, but is so easy, I'm sure you can manage ;-)

Simple Garter Stitch Scarf for a toy
Materials: 8-10 g of DK or worsted weight yarn, pair of 3.5 mm (for DK) or 4.5 mm (for worsted) straight knitting needles, tapestry needle
Gauge: not really important, as long as you like it

Cast on 8 sts. Knit in garter stitch until scarf measures 30 cm (12"), or desired length. Cut yarn, and weave in yarn ends. Optional: add a fringe at each end by knotting on extra lengths of yarn.


Friday, December 8, 2017

fancy collar accessory

Fancy Collar


This pattern makes a charming collar that can be attached to other garments such as cardigans or pullovers, to make them into a fancy holiday outfit, or it can simply be used as an accessory, to combine with multiple outfits. I’ve given two sizes of neck width, to make it easier to match to the garment of your choice.

It will save you time and confusion to read the entire pattern first, because there are several possible variations of this accessory. Reading everything will help you choose the options you need to achieve good results on your first try.

Left: size large with wide neck, knit with worsted weight yarn.
Middle: size medium with narrow neck, knit with DK weight yarn.
Right, size small with wide neck knit with fingering weight yarn.

Yarn and Notions
10-15 g of yarn in colour of your choice, a few straight or safety pins, narrow ribbon or extra yarn or button (plus needle and thread to attach) to join collar ends (optional), crochet hook (optional)
Needles: use a pair of straight needles in the size required for your toy/yarn (see below)
Size Small: with fingering weight yarn and 3 mm (US size 2.5) straight knitting needles, collar will fit my regular 8-9” tall toys
Size Medium: with sport or DK weight yarn and 3.5 mm (US size 4) straight knitting needles, collar will fit my Wood Elf Doll or 10-12” toys
Size Large: with worsted weight yarn and 4.5 mm (US size 7) straight knitting needles, collar will fit my large 12-16” toys

Note: For a non-lacy collar, you can work the yo stitches as m1; but, the collar will be less stretchy. 

Instructions
CO 52 sts.
Row 1 (WS): Knit.
Row 2: k1, [k1, yo, k1, ssk, k2tog, k1, yo] x 7, k2.
Row 3: k2, [k2, k2tog, k3] x 7, k1. (45 sts)
Row 4: k1, [k1, yo, k1, s1, k2tog, psso, k1, yo] x 7, k2.
Row 5: Knit.
Row 6: k1, [k2, ssk, k2] x 7, k2. (38 sts)
For wide-neck collar, bind off now.
For narrow-neck collar, work next 2 rows.
Row 7: Knit.
Row 8: k3, ssk, k8, ssk, k8, ssk, k8, ssk, k3. (34 sts)
Bind off.

Finishing
If attaching the collar to a cardigan, pin in place, matching ends at edges of button bands. Then use yarn ends to sew the inner edge of the collar to the collar of the cardigan. I used back-stitch, working through the edges of collar and cardigan, to get a tidy line of stitches on the inside. Weave in ends on WS of the collar.

Collar attached to neck of cardigan.
If attaching the collar to a pullover, stitch the collar to the garment at centre front and back, and each shoulder, but leave the rest of the collar loose. If you sew it on all the way around, it may be difficult to get over your toy’s head.


If using the collar as an accessory, choose one of the following methods to join collar ends at centre-front.
Button: For a collar that stays attached in front, simply match up top corners, and sew button on through both layers (the toy heads are squishy, so you should still be able to get it on). For a collar that can open, sew button to one corner. On opposite corner, make a button loop from a length of yarn, or crochet a button loop.
Button with a crocheted loop.
Ribbon or Yarn: Attach a 10 cm (4”) length of ribbon or yarn to each top front corner, or make single-crochet ties with extra yarn. For extra fun, attach beads or bells to the ends of the ties.

Single-crochet ties, with bells added to ends.

Abbreviations
[ ] x N = repeat sequence in brackets N times ("to end" means to repeat until the end of the row)
CO = cast on
K = knit
k2tog = decrease 1 by inserting needle from front to back into next 2 sts on left-hand needle, then knit together
m1 = increase 1 by picking up loop between stitch just worked and next stitch, from front to back, and knit into the back of this loop
P = purl
psso = pass slipped stitch over stitch just worked, to decrease 1 stitch
RS = right side
s1 = slip one stitch from left-hand needle to right-hand needle, making sure not to twist
ssk = decrease 1 by slipping 2 stitches purl-wise, slip back to left-hand needle, then knit slipped stitches together
st or sts = stitch or stitches
WS = wrong side
yo = yarn over: bring yarn forward, then over the needle to the back again. This makes a loop which can be worked as an extra stitch on the next row

Pattern links
Fudge the Dog, Cardigan from Polar Bear, Wood-Elf Doll, Deer from Backyard Bandits, Pullover from Breton Shore Outfit

Thursday, December 1, 2016

polar bear pouch

I have a new winter holiday pattern for you this year: a little knitted pouch, with a flap shaped as a polar bear face! This quick knit makes a sweet tree ornament, or it can be worn as a necklace. Hide a surprise or a treasure inside to make it extra special!
You need to know how to knit in the round, increase, decrease (ssk and k2tog), and make bobbles. An intermediate-level knitter should be able to knit and finish at least one of these in an evening. But don't be intimidated if you're more of a beginner: this project is so small, it's a great way to learn a new skill!

You will find the full pattern below, or download the PDF from Ravelry. Happy holiday knitting!

P.S. If this project is not your style, try one of my other free holiday patterns: Holiday Mice, Inuk and Seal, Reindeer finger-puppet, Mini Pookies. (Ravelry links: Holiday Mice, Inuk and Seal, Reindeer finger-puppet, and Mini Pookies.)


Tuesday, November 1, 2016

10 year anniversary celebration

I'm resurrecting this long-quiet blog, to announce a special 10 year anniversary event!

It has been ten years since I opened my first shop on Etsy, and I wanted to do something special to show all my lovely customers how much I appreciate you. To start off a week of fun give-aways, I've updated my very first pattern: a teddy with a sweet cardigan. You can download it for free, for the whole month of November! I'll announce a new prize each day this week, both here and on my Facebook page, so be sure to check back later! More details will be given each day, but the give-aways will remain open for a while, so don't worry about missing them.

Teddy Pattern
 I never thought I would still be designing knitted toys ten years after I started, as it was just something to keep me busy between jobs. I've learned so much over the years, tried lots of interesting things, and I am still enjoying creating cute toys for people to knit. I have some projects in mind for the next year or two, so if you enjoy my patterns, be sure to visit and see what I'm up to!

Saturday, November 21, 2015

holiday pattern round-up

Instead of a new holiday pattern this year, I wanted to share with you all the free patterns I've made in previous years. Perhaps you missed something in the past, your knitting skills have improved and you want to try new things, or you'd like to see an old project in a new way. Whatever the reason, I hope you find an hour or two to try out one of these adorable patterns. 

(Links are below, not on the individual photos)


From left to right, along to top row:

1. My most popular holiday pattern, these Mice are easy and quick to make. They can be toys to tuck into a stocking, tree ornaments, or even a gift topper. Knit them from bits of left over yarn, in any weight from fingering to worsted.

2. A close second, Mini Pookies are quirky and sweet. They're the perfect size for a Christmas tree, a child's hands, or even add a bit of cat-nip for your favourite kitty.

3. If you'd rather knit an accessory, this free hat pattern is easy and fast. Two 50 g balls of worsted yarn in your toddler's favourite colours, a few hours of knitting, and you'll have a toasty warm gift!

From left to right, along the bottom row:

4. If you know someone who loves pandas as much as my little boy, this toy is perfect. You can make a little pocket friend, or a finger puppet!

5. This reindeer finger-puppet is very similar to the panda, and more seasonal. If you don't mind a bit of hand-sewing, you can make the antlers from felt.

6: A special ornament set for those who love the North, this pattern makes an adorable baby seal and a little Inuk (person). Dress your Inuk in your favourite colours, and make the hair long or short. You can also have fun with a bit of embroidery on the coat.

And if these ideas are not enough, here's a few more:


7. One of my oldest patterns, these little stuffed trees are a great way to use up little bits of left-over yarn.

8. Have you wanted to try felting, and have some bits of wool yarn you're not using? Try making some felted star ornaments.

9. Finally, for those friends or relations who don't appreciate seasonal decorations, maybe you could knit some Mini Aliens!

For even more ideas, have a look at this similar post from Knitted Bliss.


Tuesday, May 19, 2015

Wee Panda Toy and Finger Puppet


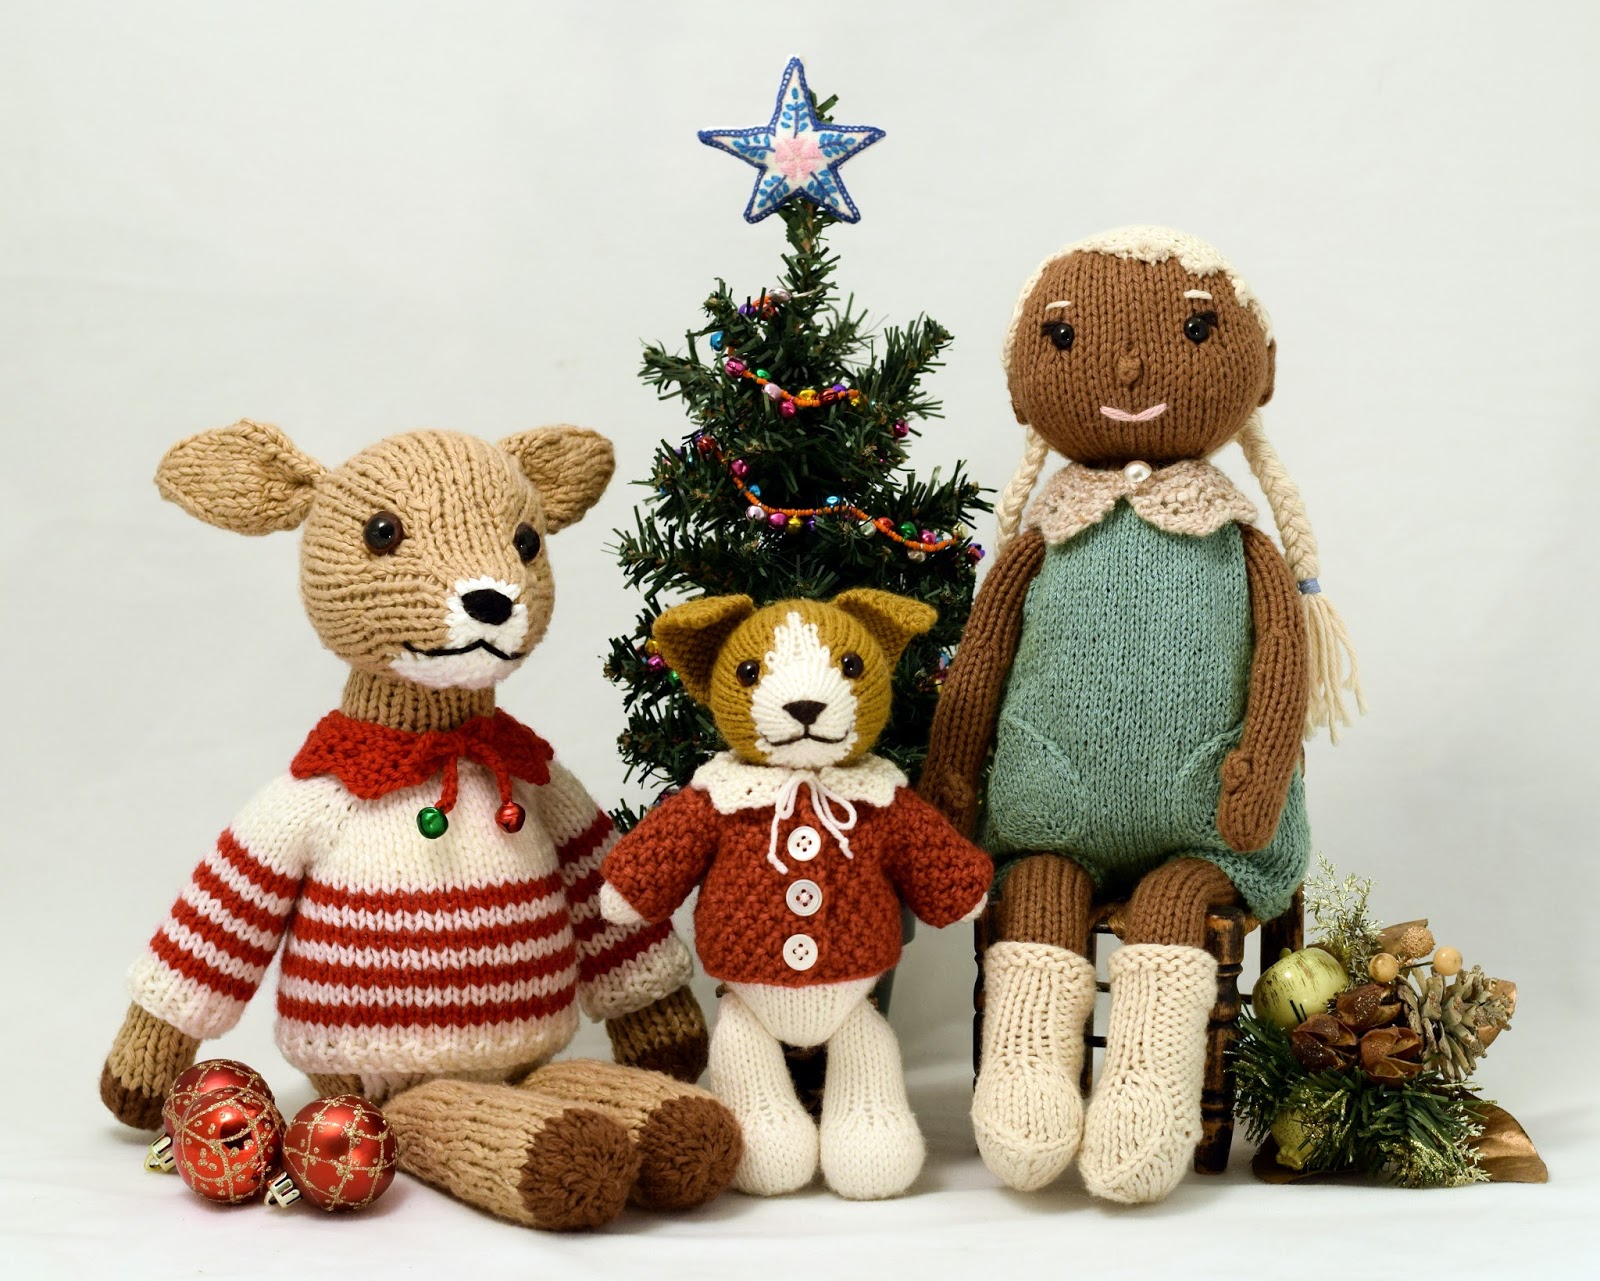
In honour of my birthday today, I'm sharing a new free pattern with you! This one was originally published in Knit Now magazine last year. I've made a few small changes to that version, and added a finger puppet body. These tiny toys are great as a last minute gift. You can turn them into back-pack accessories, a key-chain, or just give them as a special pocket-friend. (Tip: you can also ignore the colour changes, and so make the toy a bear or hamster instead. Or, if you own the Wee Wuzzies pattern, you can add their heads and tails to the finger puppet body, and make a whole handful of cuteness!)

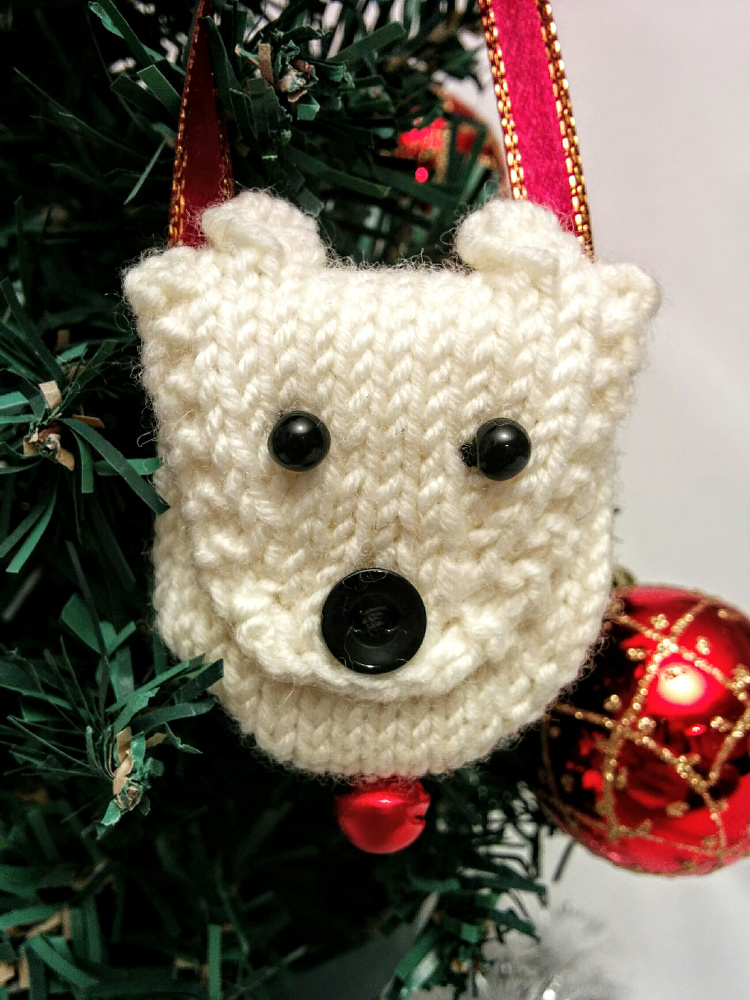
I hope you all enjoy making a Wee Panda or three! 


Materials
9 g of white (MC) and 6 g of black (CC) DK weight yarn, pair of 3.25 mm (US size 3) knitting needles, pair of black 6 mm safety eyes or beads, polyester stuffing, tapestry needle
Gauge 
5.5 sts and 8.5 rows = 2.5 cm (1") measured over st st
Size 
5.5 cm (2¼”). The finger puppet will fit a child or small adult hand.

Notes
Use a long-tail, or similar, cast on. Leaving a 25 cm (10”) yarn end when casting on will give you a convenient length of yarn for seaming and assembling the toy.
Intarsia colour changes are marked by the yarn colour preceding each set of stitches. Use mattress stitch for seams, and whip stitch to assemble toy pieces.
If you don’t want to work the intarsia eye-patches, they can also be embroidered with duplicate stitch on the finished head.

Toy Body 
Begin at bottom. With MC, cast on 6 sts.
Row 1: Purl.
Row 2: K1, [m1, k1] to end. (11 sts)
Row 3: Purl.
Row 4: K1, [m1, k1] to end. (21 sts)
Row 5: MC p7, CC p1, MC p5, CC p1, MC p7.
Row 6: MC k7, CC mb, MC k5, CC mb, MC k7.
Continue in MC.
Row 7-12: Work 6 rows in st st.
Break off MC, change to CC.
Row 13: Purl.
Row 14: K7, mb, ssk, k1, k2tog, mb, k7. (19 sts)
Row 15: Purl.
Row 16: K2, [ssk] x 3, k3, [k2tog] x 3, k2. (13 sts)
Row 17: Purl.
Bind off. With a length of MC yarn (or the ends from working instaria) sew down the edges of the bobbles, then knot yarn ends tightly together and trim short. Sew together cast-on edge, then sew up back seam, leaving bound-off edge open. Stuff body (you'll need to be careful when stuffing the body, so the black yarn ends from the bobbles don't show).

Finger Puppet Body 
Begin at bottom. With MC, cast on 16 sts.
Row 1-2: Beginning with a P row, work 2 rows in st st.
Row 3: MC p5, CC p1, MC p4, CC p1, MC p5.
Row 4: MC k5, CC mb, MC k4, CC mb, MC k5.
Row 5-7: Work 3 rows in st st.
Row 8: K5, ssk, k2, k2tog, k5. (14 sts)
Row 9-10: Work 2 rows in st st.
Break off MC, change to CC.
Row 11: Purl.
Row 12: K4, mb, ssk, k2tog, mb, k4. (12 sts)
Row 13: Purl.
Bind off. With a length of MC yarn (or the ends from working instaria) sew down edges of bobbles, weave yarn ends through the bobbles a few times, and trim ends. Sew up back seam, leaving cast-on and bound-off edges open.

Head 
Begin at back of head. With MC, cast on 7 sts.
Row 1: Purl.
Row 2: K1, [m1, k1] x 5, k1. (12 sts)
Row 3: Purl.
Row 4: K1, [m1, k1] x 10, k1. (22 sts)
Row 5: MC p8, CC p1, MC p4, CC p1, MC p8.
Row 6: MC k8, CC kfbf, turn, p3, turn, sk2p, MC k4, CC kfbf, turn, p3, turn, sk2p, MC k8. (this rows makes tiny bobbles for the ears)
Continue in MC.
Row 7-9: Work 3 rows in st st.
Row 10: MC k6, CC k4, MC k2, CC k4, MC k6.
Row 11: MC p6, CC p4, MC p2, CC p4, MC p6.
Continue in MC.
Row 12: K2, [k2tog] x 4, k2, [ssk] x 4, k2. (14 sts)
Row 13-15: Work 3 rows in st st.
Row 16: [k2tog] x 7. (7 sts)
Cut yarn, thread end through loops of rem sts, and pull tight to gather. Weave in yarn ends from intarsia sections. Attach safety eyes. Sew seam towards back of head, leaving an opening. Stuff head, smoothing and shaping as you stuff. Sew closed. Embroider nose and mouth. Sew head to the open bound-off-edge of the toy or puppet body.

Abbreviations 
[ ] x N = repeat sequence in brackets N times ("to end" means to repeat until the end of the row)
K = knit
k2tog = decrease 1 by knitting 2 together
kfbf: increase 2 by knitting into front, then back, then front of next stitch
m1 = increase 1 by picking up loop between stitch just worked and next stitch, and knit into the back of this loop
mb = Make bobble: increase 5 sts into next st (knit, purl, knit, purl, knit into this stitch), turn. P5, turn. K5, turn. P5, turn. Ssk, k1, k2tog, then, one at a time, pass first 2 sts over the last st on your right-hand needle, to get 1 rem st.
P = purl
RS = right side
s2kp = decrease 2 by slipping 2 stitches as if to k2tog, knit the next stitch, then pass the 2 slipped stitches over the knit stitch
ssk = decrease 1 by slipping 2 stitches purl-wise, slip back onto left needle, then knit slipped sts together
st or sts = stitch or stitches
st st = stockinette stitch
WS = wrong side


Kyr very kindly modelled the toys for me, 
so you can see how big they are compared to a 4-year old.

Friday, December 5, 2014

reindeer finger-puppet pattern

Here's a cute little project that you can make in those little bits of time you always have during the holidays: chatting with family at parties, waiting for a school pageant to start, watching Christmas specials with your kids for the 12th time.

It's a fairly easy knit, so if you can knit, purl, increase, decrease, and change colours, you should be fine! I've made the antlers from felt, but if you hate hand-sewing, and your kids are a bit older, you could use pipe-cleaners (chenille wires) instead. Wouldn't your children be so pleased to find one of these in their stocking?


Please note, this is a free pattern, and I haven't had time to get it test-knit. If you find a mistake, or have a question, please email me (barbara at fuzzymitten .com).
Materials
15 g of worsted weight yarn in light brown (MC), 5 g of worsted weight yarn in white (CC), pair of 4 mm (US size 6) knitting needles, two 4 mm (US size 6) double pointed needles (dpns), pair of 6 mm safety eyes or beads, stuffing, yarn to embroider the face, tapestry needle, brown felt plus hand-sewing needle and thread
Gauge
22 sts and 32 rows per 10cm (4˝) in st st
Size
8 cm (3”)


Body
CO 34 sts with MC.
Row 1: P6, bind off 8 sts, p6, bind off 8 sts, p6. (18 sts, the bound off stitches make the legs)
Row 2: K5, ssk, k4, k2tog, k5. (16 sts)
Row 3-7: Work 5 rows in st st.
Row 8: K5, ssk, k2, k2tog, k5. (14 sts)
Row 9-11: Work 3 rows in st st.
Row 12: K4, k2tog, k2, ssk, k4. (12 sts)
Change to CC.
Row 13-14: Work 2 rows in st st.
Bind off. Using a length of your MC yarn, sew the tops and bottoms of the feet together with a few whip stitches.

Arm (make 2)
With dpns and MC, cast on 3 sts. Work in I-cord for 5 rounds. Cut yarn, thread end through remaining stitches, and pull tight to gather.
If you don’t want to work the arms as I-cord, cast on 4 sts, and work in st st for 5 rows. Cut yarn, thread end through remaining stitches, and pull tight to gather. Then sew arm seam towards cast-on edge.

Head

Start at back. CO 6 sts with MC.
Row 1: Purl.
Row 2: k1, [m1, k1] x 5. (11 sts)
Row 3: Purl.
Row 4: k2, [m1, k1] x 8, k1. (19 sts)
Row 5-9: Work 5 rows in st st.
Row 10: k3, ssk, k1, k2tog, k3, ssk, k1, k2tog, k3. (15 sts)
Row 11: Purl.
Row 12: k4, k2tog, k3, ssk, k4. (13 sts)
Change to CC.
Row 13-15: Work 3 rows in st st.
Row 16: [k2tog] x 3, k1, [ssk] x 3. (7 sts)
Cut yarn, thread end through remaining sts, and pull tight to gather. Attach safety eyes or beads, or embroider eyes with black yarn. Sew seam, leaving an opening. Stuff head, then sew closed. Embroider a nose and mouth.

Ear (make 2)
CO 3 sts with MC.
Row 1: Purl.
Row 2: K1, m1, k1, m1, k1. (5 sts)
Row 3-5: Work 3 rows in st st.
Row 6: K1, ssk, k2. (4 sts)
Row 7: [p2tog] x 2. (2 sts)
Pass first stitch over second. Cut yarn, pull end through rem st, then thread yarn end along side of ear to cast-on edge. Sew cast-on edge of ears to head, then weave in yarn ends.

Finishing
Sew cast-on edge of arms to body, then weave in yarn ends on WS of body. Sew body’s back seam from cast-on edge to bound-off edge, leaving the bound-off edge open, for sewing to the head.
Make antlers from felt: cut out 4 pieces of felt using the photo below as your pattern*. Matching 2 pieces together, sew around outside edges with a blanket stitch. Sew antler base to the head, just above one ear. Repeat for the other antler. (Another method of making antlers is to use pipe-cleaners or chenille wire, but this is not recommended for young children)
Sew head to open bound-off edge of body. Weave in yarn ends. If you like, add a bow and jingle-bell.

*You should be able to click on the photo above, and then print it. I have tried to make the photo so that it will print at the correct size to use as a pattern for cutting out your antler pieces. But if it's not the correct size, just use it as a guide for the shape. All reindeer have different antlers anyway!

P.S. If you want to make a whole family of finger puppets, the body from the reindeer will work with any of the heads from my Wee Wuzzies pattern. You'll just need to knit it in the appropriate colours.


Abbreviations
[ ] x N = repeat sequence in brackets N times ("to end" means to repeat until the end of the row)
CO = cast on
K or k = knit
k2tog = decrease 1 stitch by knitting 2 together
m1 = increase 1 by picking up loop between stitch just worked and next stitch, from front to back, and knit into the back of this loop.
P or p = purl
p2tog = decrease 1 stitch by purling 2 together
ssk = decrease 1 stitch by slipping 2 stitches purl-wise, then knit slipped stitches together
st or sts = stitch or stitches
st st = stockinette stitch WS = wrong side

Thursday, May 22, 2014

free pattern: polo-neck pullover

My original Squirrel knitting pattern came with a turtle-neck sweater, which was very simple - back and front knit the same, then sleeves picked up and knit straight. Boxy and plain, a bit awkward to sew together, and ill-fitting for the shape of the toy. But the Squirrel was one of my first patterns, and I had to start somewhere!

When I updated the pattern for my Festive Knits collection, I included overalls instead of the sweater, because I thought they looked much cuter, and they fit a lot better. I had always intended to publish the original turtle-neck sweater as a free pattern, but procrastinated because I was really not happy with the design. However, featuring the Squirrel pattern this month seemed like the perfect opportunity to update that poor sweater, and offer you a little something to dress-up your squirrels (and other toys).

While it looks similar to the original, this polo-neck pullover is completely new (hence the new name): it's knit in the round from the top down, and is completely seamless. The only sewing you need to do is weaving in ends, and closing some small holes under the arms. It knits up in under 2 hours, so you can make one in an evening, enjoying a good movie! The length of the body and arms is easy to adjust, so you can make it fit any of my various small toys. The estimate of 25 g of yarn is generous, so it's a good way to use up some left-over yarn.

I hope you enjoy this pattern, and maybe knit a little squirrel to go with it!

Polo-Neck Pullover

Materials
25 g of worsted weight yarn, set of four 4.5 mm (US size 7) double pointed needles (dpns), scrap yarn, tapestry needle
Gauge
4.5 sts and 6 rows per 2.5 cm (1”) in stockinette
Measurements
22 cm (8½“) around at hem, approx. 9 cm (3½”) long

Neck and Yoke
CO 24 sts. Distribute sts evenly on 3 of your dpns.
Rnd 1: Join in the round, [k1, p1] to end.
Rnd 2-8: [k1, p1] to end.
Rnd 9-10: Knit 2 rnds.
Rnd 11: [m1, k2] x 12. (36 sts)
Rnd 12-13: Knit 2 rnds.
Rnd 14: [m1, k2] x 18. (54 sts)
Rnd 15-16: Knit 2 rnds.
Rnd 17: [m1, k3] x 18. (72 sts)
Rnd 18: Place 16 sts on scrap yarn for Left Sleeve, k22 sts for Front, place next 16 sts on scrap yarn for Right Sleeve, k18 sts for Back. Continue below for Body of Pullover.

Body
Redistribute sts on dpns if necessary.
Rnd 20-21: Knit 2 rnds.
Rnd 22: m1, k22, m1, k18. (42 sts)
Rnd 23-30(32): Knit 8(10) rnds. (adjust the length of the body to fit your toy)
Next 2 rnds: [k1, p1] to end.
Bind off loosely in ribbing pattern.

Sleeves (same for both sides)
Place sts for one sleeve on 3 of your dpns, distributing the sts as evenly as possible.
Begin at underarm.
Rnd 1-6(8): Knit 6(8) rnds. (adjust the length of the sleeves to fit your toy)
Next 2 rnds: [k1, p1] to end.
Bind off loosely in ribbing pattern.

Finishing
Weave in all yarn ends, making sure to close holes at the underarm. Block finished pullover.

You may notice the toy is the Chipmunk, not the Squirrel. I didn't have a Squirrel toy to use in the photos.

Abbreviations
[ ] x N = repeat sequence in brackets N times ("to end" means to repeat until the end of the row)
CO = cast on
K or k = knit
m1 = increase 1 by picking up loop between stitch just worked and next stitch, and knit into the back of this loop
P or p = purl
Rnd = Round, or 1 row worked in the round
st or sts = stitch or stitches
st st = stockinette stitch

Friday, February 21, 2014

linen stitch bunny blanket

One of the featured patterns for February is the Mama and Baby Bunny pattern. When these patterns were originally published in my pattern collection, Festive Knits, the Baby Bunny pattern also included a simple blanket. However, we decided not to include the blanket when we published the two patterns together. Below you will find instructions for another simple, but lovely, baby blanket that any little toy would be happy to snuggle into!

There are two sizes given - the small blanket is shown in the photos. It is fairly quick to make, and a good size for the baby bunny or any other small toy. The medium blanket would be a good size for my regular sized (8-9”) toys. I’ve used fingering weight yarn because I have lots of pretty sock yarn scraps in my stash. But you could easily use a thicker yarn for a larger, or quicker, knit.


Linen Stitch Bunny Blanket

Materials
15-25 g of fingering weight yarn, pair of 3.25 (US size 3) knitting needles, tapestry needle
Gauge
7.25 sts and 10 rows per 2.5 cm (1”)
Size
Small (10 x 15 cm, 4 x 6”) or Medium (15 x 20 cm, 6 x 8”)

You can make the blanket from a single yarn, in a solid or variegated colour, or use up a bunch of yarn scraps for a more colourful blanket. If you use scraps, change yarns every 3 rows, leaving 3” ends when joining yarns, to be knotted into a fringe.

CO 47 or 61 sts.
Row 1 (WS): P1, s1, [p1, s1] to last st, p1.
Row 2: K1, [k1, s1] to last 2 sts, k2.
Repeat Rows 1-2 until blanket measures 10 cm/4” (small), or 15 cm/6” (medium), from the cast-on edge, ending on a WS row. Bind off. If you used a single yarn, weave in your yarn ends. If you used yarn scraps, overhand knot the yarn ends into a fringe on both ends of the blanket (you can add extra strands if you want a thicker fringe). Trim the fringe to 2.5 cm (1”)


Abbreviations
CO = cast on
K = knit
P = purl
RS = right side
s1 = slip 1 stitch from your left needle to your right needle. Remember to bring the yarn forward before slipping a stitch on RS rows, and to take the yarn back before slipping a stitch on WS rows, so that the strands always show on the RS of the blanket. It’s important to keep an even tension when slipping stitches.

WS = wrong side

Save 50% on both the Mama and Baby Bunny pattern (Ravelry, Etsy), and the Flat Foot Floogies pattern (Ravelry, Etsy), until the end of February!

P.S. the little bunny in the first photo is from my Bedtime Clothing Bundle.

Wednesday, November 27, 2013

mini pookies ornament pattern

These Mini Pookies are super quick and easy to knit, using mostly basic knitting skills. The most challenging part is the shaped bobble that makes the nose of the Polar Bear and Arctic Fox, but there's only one per toy, and the stitches are useful to know. Since the idea of a sheep was also very popular, I decided to include that design too. The Sheep pookie is even easier to knit, and just as sweet. To make them extra special, I used some left-over bits of Blue Sky Alpacas' Royal Petites yarn. Since each toy only needs a few yards of yarn, they're perfect for using up tiny left-over bits, and totally worth the luxury of two little balls of extra nice yarn.

I hope you left an hour or two in your holiday knitting time to make some Mini Pookies to decorate your home, or pop into a lucky kid's stocking!

P.S. You can go here to download the PDF to take along with your knitting, or to send as a gift to a knitting friend.


Mini Pookies


Materials for one toy
5 g (about 15 m) of sport weight yarn in colour A, 7 g (about 20 m) of sport weight yarn in colour B, pair of 3 mm (US size 2.5) knitting needles, pair of 6 mm safety eyes, stuffing, black yarn to embroider the face, tapestry needle, 15 cm of cord for hanging (optional).
Gauge
7.5 sts and 10 rows per 2.5 cm (1”) in stockinette
Size
6 cm (2 ¼⁣ᐦ) tall


Notes
You could easily knit these in the round, if you prefer. Divide the stitches as evenly as possible between your double-pointed needles. Before working the final row of decreases, attach the safety eyes, weave in the yarn ends from the colour change, and stuff the toy. The ears must all be knit flat.


Polar Bear and Arctic Fox
Begin at bottom. CO 9 sts with yarn A.
Row 1: Knit.
Row 2: k1, [m1, k1] x 8. (17 sts)
Row 3: Knit.
Row 4: k1, [m1, k2] x 8. (25 sts)
Row 5: Knit.
Row 6: k1, [m1, k3] x 8. (33 sts)
Row 7-13: Beginning with a P row, work 7 rows in st st.
Row 14: k16, k2tog, k15. (32 sts)
Row 15-16: [k1, p1] to end.
Row 17: Knit.
Switch to yarn B on next row.
Row 18: ssk, k30. (31 sts)
Row 19: Purl.
Row 20: k15, increase 2 into next stitch (knit, purl, knit into stitch), turn. P3, turn. K1, m1, k1, m1, k1, turn. P5, turn. K5, turn. P5, turn. K1, s2kp, k1, turn. P3, turn. S2kp, k15. (this row makes a shaped bobble for the muzzle)
Row 21: p15, s1, p15.
Row 22: k15, s1, k15.
Row 23: p15, s1, p15.
Row 24-25: Work 2 rows in st st.
Row 26: [k1, k2tog] x 10, k1. (21 sts)
Row 27: Purl.
Row 28: [k2tog] x 10, k1. (11 sts)
Cut yarn, thread end through remaining stitches, and pull tight to gather. Put a tiny piece of stuffing inside the bobble, then carefully sew down the sides, knotting the yarn securely on the WS when you’re done. This makes the muzzle. Embroider a nose and mouth with black yarn. Attach the safety eyes. Gather together the cast-on stitches, then sew the back seam towards the head, leaving an opening. Stuff the toy, finish sewing the back seam, and weave in the yarn ends. Make a pair of ears.


Polar Bear Ear (make 2)
CO 13 sts with yarn B.
Row 1: K 1 row.
Row 2: [k1, ssk] x 2, k1, [k2tog, k1] x 2. (9 sts)
Row 3: K 1 row.
Row 4: [ssk] x 2, k1, [k2tog] x 2. (5 sts)
Cut yarn, thread end through remaining sts, pull tight to gather. Sew the ears to the head: the CO edge is the top edge of the ear. Curving the edge sewn to the head will give the ears a more realistic shape.


Arctic Fox Ear (make 2)
CO 15 sts with yarn B.
Row 1: Knit.
Row 2: k6, s2kp, k6. (13 sts)
Row 3: Knit.
Row 4: k5, s2kp, k5. (11 sts)
Row 5: Knit.
Row 6: [ssk] x 2, s2kp, [k2tog] x 2. (5 sts)
Cut yarn, thread end through remaining sts, pull tight to gather. Sew the ears to the head: the CO edge is the top edge of the ear. Curving the edge sewn to the head will give the ears a more realistic shape.


Sheep
Begin at bottom. CO 9 sts with yarn A.
Row 1-18: Work same as for Bear/Fox.
Row 19: k11, p9, k11.
Row 20: Knit.
Row 21-24: Work same as Rows 19-20.
Row 25: k12, p7, k12.
Row 26-27: Knit.
Row 28: [k1, k2tog] x 10, k1. (21 sts)
Row 29: Knit.
Row 30: [k2tog] x 10, k1. (11 sts)
Cut yarn, thread end through remaining stitches, and pull tight to gather. Attach the safety eyes. Gather together the cast-on stitches, then sew the back seam towards the head, leaving an opening. Stuff the toy, finish sewing the back seam, and weave in the yarn ends. Embroider a nose and mouth with black yarn. Make a pair of ears.


Sheep Ear (make 2)
CO 3 sts with yarn B.
Row 1: Knit.
Row 2: k1, m1, k1, m1, k1. (5 sts)
Row 3: Knit.
Row 4: k2, m1, k1, m1, k2. (7 sts)
Row 5-10: Knit in garter stitch.
Bind off. Fold the ear in half lengthwise, then sew together the bound-off edge. Sew this edge to the side of the Sheep’s head, with open side facing forward and folded side facing backward. Weave in yarn ends. Repeat for the second ear.


Hanging Loop (optional)
Thread cord for hanging under the gathered stitches on the top of the toy. Pull halfway through, then knot the two ends together.


Abbreviations
[ ] x N = repeat sequence in brackets N times ("to end" means to repeat until the end of the row)
CO = cast on
K or k = knit
k2tog = decrease 1 by knitting 2 together
m1 = increase 1 by picking up loop between stitch just worked and next stitch, and knit into the back of this loop
P or p = purl
RS = right side
s2kp = decrease 2 by slipping 2 stitches as if to k2tog, knit next stitch, then pass 2 slipped stitches over the one knit.
ssk = decrease 1 by slipping 2 stitches purl-wise, then knit slipped stitches together
st or sts = stitch or stitches
st st = stockinette stitch

WS = wrong side