Showing posts with label patternmods. Show all posts

Friday, February 28, 2020

Bunimals Modifications

Bunimals: Simple toys with many possible modifications

My new toy pattern, called Bunimals (bun+animals), was intentionally designed to be easy to modify into other types of animals. The pattern includes a variety of shapes with the ears and other appendages, while all the other details are kept as simple as possible. This way you can easily modify the pattern by changing the yarn colour or texture, mixing and matching the pieces, or making small alterations to the pieces provided, such as adding or removing length.

One simple modification is to change the yarn colour to better match the animal you want to make, such as using black and white to change the robin into a penguin. Another is to use the frog leg instructions to make legs to add to the other animals.

A more involved modification I tried was to use chunky weight yarn and 5 mm needles to make a larger toy. I used about 75 g of a single colour to knit the seal toy, and it turned out about 50 cm around and 10 cm tall (20"x4"). To make any of the two-colour designs in this way, make sure you have about 60 g of the MC and 15 g of the CC. You’ll also want safety eyes that are 15-18 mm in size.


Below I’ve described a few of the modifications that I imagined when designing the pattern (two I knit, the others I sketched for you), but I hope you use your creativity to make many more!


Cat pattern → Squirrel or Fox
To create a squirrel or fox from the cat pattern, choose a reddish-brown or orange yarn for your main colour (MC), and white for your contrasting colour (CC). Then just knit the pieces as written. I also used a fringe/eyelash yarn to knit the tail, adding a few extra rows because the gauge of the fringe yarn is different from the worsted weight yarn. I omitted the bit of CC at the end of the tail to make my toy look more like a squirrel. Embroider a small nose and a happy mouth.


Frog → Seal
To make a seal, you’ll need 50 g of white or grey yarn. Knit the whole body in your colour of choice. Then knit four leg pieces, but leave them un-stuffed. Two of these will be attached at the sides of the face as front flippers. To make the tail flippers, fold the other two leg pieces in half lengthwise, then place them on either side of the seam at the centre-back. Make sure the folded side faces up, and that you catch all the layers as you sew them onto the body. Embroider a V-shaped nose and wider mouth.


Mouse → Panda
To make a panda, you will need 40 g of white for your MC and about 10 g of black for your CC. Knit the body all in white. Before attaching the eyes, embroider small eye-patches with some black yarn, using a duplicate stitch technique. Knit the ears in black, and omit the pink duplicate stitch on the front. If you have enough black yarn, knit the legs from the frog pattern, and add them to the toy. Embroider a medium-size nose and a downward facing mouth.

Mouse → Koala
To make a koala, use grey for your MC and white for your CC, then knit the pieces as written. Embroider the front of the ears with your white yarn (if you have some fuzzy white yarn for this, even better). Embroider a large nose, positioned slightly above the centre of the eyes. A simple mouth works well for this toy.

Rabbit → Dog
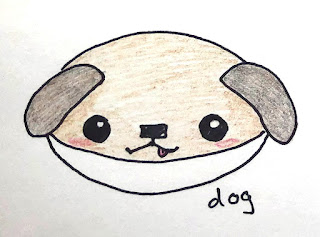
To make a dog, use a lighter brown yarn for your MC and white for your CC. If you like, use a dark brown or fuzzy yarn for the ears. Knit the body and ears as written, but exclude the tail. Attach the ears to the head so they hang down beside the face. Or, attach the ears pointing up, then fold them forward and sew in place.  After you embroider the nose and mouth with black yarn, embroider a little pink tongue.
For a tail, CO 10 sts with whichever yarn colour you like. Work in stockinette until the tail is about 7 cm (3”) long. Then cut the yarn, thread the end through the stitches, and pull tight to gather. Sew along the tail seam, but don’t add stuffing, so the tail will remain flexible. Attach the tail to the centre-back of the toy body.

Robin → Chick or Ducking
To make a chick or ducking, you’ll need 50 g of light yellow yarn, plus about 5 g of orange yarn. Knit the body, wings, and tail from the yellow yarn. For a chick, knit the beak from orange yarn. For a duckling, knit a second “tail” piece from orange yarn to make a bill, and add a bit of stuffing. Assemble the toy pieces as described in the pattern.

I look forward to seeing all the adorable toys you knit from this pattern, and please consider sharing any inspiring modifications you create.

Sunday, June 16, 2013

wee dragon

Here is a fun modification of my Wee Woodland Wuzzies pattern: a Wee Dragon! To make this toy, you will need a copy of that pattern *, plus the Dragon and Friends pattern for the wings (or some felt).


Materials
20 g of worsted weight yarn in variegated green (or whatever colour you want your dragon), 15 g of fingering weight yarn in light green (or green felt), 3 and 4 mm (US size 2.5 and 6) knitting needles, polyester stuffing, a pair of 6 mm safety eyes, yarn to embroider the face, tapestry needle, hand-sewing needle and thread (if you make the wings from felt)

Use the worsted weight yarn and 4 mm needles for the Body, Head, and Tail.

Body
Work the body from the Wee Wuzzy pattern with the following mods:
After Row 10, work 5 rows of st st, instead of 3 rows.
After Row 14 (second set of bobbles), work 5 rows of st st, instead of 3 rows.

Head
Work the head from the Wee Wuzzy Mouse, ignoring the colour changes. Alternatively, work one of the other animal heads, if you would like your dragon to have a shorter or longer nose.

Tail
Work the tail from the Wee Wuzzy Otter, adding 3 more rows of st st after row 16.

Stuff and assemble the toy as written in the Wee Wuzzy pattern. Embroider a mouth, nose, and some teeth on the dragon's face. You can also add extra details like claws and eyebrows.

Wings
Using the fingering weight yarn and 3 mm needles, make the wings from the Dragon pattern. Alternatively, cut 2 wings from felt, and sew them onto your dragon's back with the hand-sewing needle and thread.

I also used my questionable crochet skills to add this little ridge down the back (sorry I can't elaborate, I just mess around with a hook and yarn until it looks about right).
Bye-bye wee dragon!

*If you don't have both patterns, and would rather buy the Dragon pattern, you could use my free Holiday Mice pattern for the body and head, and improvise a tail - start with 15 sts, and gradually decrease to 5, over about 20 rows.

P.S. I'm going to start adding the "patternmods" label to the posts which fit under that category, so they're easier to find. But they will all still have the "tutorial" label as well, if you are used to finding them that way.

Wednesday, June 27, 2012

hint #12

I knit a few Pookies in the Spring to give away as gifts, and also because I wanted to try out Knit Pick's Chroma worsted yarn for this toy. I thought if I worked from opposite ends of a ball, I could still get stripes, and make a bunch of toys that coordinate in a really fun way. It worked out super well, and only once did I have to skip a stripe in the ball of yarn so I could get different colours from each end. I tried the mid-winter colourway, having a little left from the Savannah Chaps, and the lollipop colourway, which turned out very bright! (Sorry, I don't have a photo of those, but will try to get one soon). To make it simple, you could use the Chroma yarn in the brown, grey, or natural colours to make the heads. For most of the toys* I used Sugar Bunny yarn to make the toys extra fuzzy, but it is a bit finer, and you can see the change in gauge if you look closely.


Besides trying out a new yarn for this pattern, I also tried a new animal. Being Spring, I though I would try making a lamb! It's very easy to modify the pattern to make a lamb: you'll need a bit of felt, and be comfortable with hand-sewing, to make one like the lamb in the photo above. Also note that the hood won't fit if you sew the ears on this way, but it's still cute without the hood.

To start, work the body and then the head up to Row 14, then turn the toy inside out so you can weave in the yarn ends. Turn the toy right side out. Next, cut an oval from paper, about the size you want the face. Try it on the toy's face, to see if you have the size and shape right. When you're happy with it, mark where you want the eyes. Use this as a pattern to cut the lamb's face from felt. Transfer the eye marks to the felt, and use sharp scissors to cut tiny slits for the safety eyes. Place it on the lamb's face, and pin in place. Insert the safety eyes, since they will help hold the felt while you sew it on. With hand-sewing needle and matching thread, sew the felt to the knitted face (a whip-stitch works well for this).

Now you can stuff the toy, and finish the toy body as written in the pattern. To make the lamb's ears, knit the bunny ears from the pattern, with this alteration: once you reach Row 3, work only 3 rows of stockinette (instead of 6), and then work the decreases. To finish, sew the ears to the sides of the head, and embroider a nose and mouth. Embellish the finished toy as you like!


Here's a bunny I made from the Pookies pattern, using the last of the mid-winter colourway.

*For those interested, I used Knit Pick's Suri Dream for the lamb's fuzzy fleece - a discontinued and much missed yarn! As a substitute, I find a 100% alpaca yarn, especially single-ply, gives a similar soft, fuzzy look.

Monday, May 24, 2010

mod for scraps chaps

I recently knit another Scraps Chaps bunny (Ravelry, Etsy) and decided to try something a little different for the bum. I don't usually mind sewing up that part of the toy, but I know some of you hate seaming. So I redesigned the nether bit of the toy, so it's easier to knit in the round, and there's no seam. The first photo below shows the original version, and the second photo shows the redesigned bum. The knitting instructions follow, and the abbreviations are the same as you will find at the end of your pattern.

original

as per instructions given below

Work the body as written until Row 35. Then finish the body as follows:

Row 36: k3, [skpo] x 3, k6, skpo, k4, k2tog, k6, [k2tog] x 3, k3. (30 sts)
Row 37: p1, k9, p10, k9, p1.
Row 38: [k3, k2tog] x 6. (24 sts)
Row 39: P 1 row.
Row 40: [k2, k2tog] x 6. (18 sts)
Row 41: P 1 row.
Row 42: [k2tog] x 9. (9 sts)
Cut the yarn, thread the end through the remaining sts, and pull tight to gather. Then sew up the back seam and stuff the body. (If you knit the body in the round, secure the yarn ends and stuff the body)

Sunday, January 17, 2010

sleepy puppy

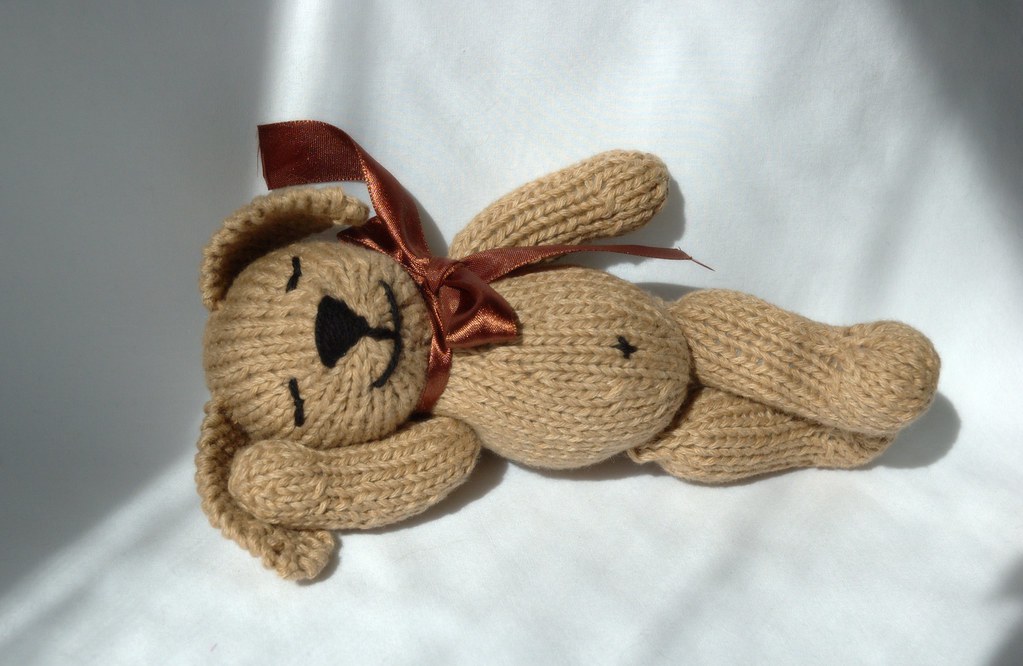
One of the most popular toys I've ever made was the Sleepy Puppy. Many people have asked for a specific pattern for this toy, but the truth is he was made from my Pupster pattern. I think it was just a combination of the yarn and his sweet face and pose, that made him seem so special. I thought it might be useful if I gave you a few more details, in case you'd like to make a sleepy puppy too.


First, simply ignore the colour changes in the pattern, and knit the toy all in one colour. The yarn I used was Pakucho Organic Cotton, in the chocolate colourway. This yarn is closer to aran weight, so the toy ends up a bit chubbier than when I use a regular worsted weight yarn. Also, you will probably need slightly more than 50 g to complete the toy. The yarn is lovely: soft with a nice texture, and you can feel really good about giving the finished toy to a baby (who will certainly chew on it). There are several brands of organic cotton available, and I think others would work just as well. I've used Estelle Cloud Cotton Eco (Ravery link), which has a different texture than the Pakucho, but is the same weight.


The face is actually very simple. You make the nose and mouth as I show in this tutorial. The eyes are just shallow V's (go here to see the photo in more detail). I used a superwash wool in black for the face of this toy, but you could also use cotton if that's what you have. Last but not least, the bellybutton! This definitely adds to the cuteness factor. It's just a small 'x' stitched onto the puppy's tummy. A satin ribbon around the neck is a nice finishing touch, if the toy will be a gift.

Friday, October 9, 2009

monster time!

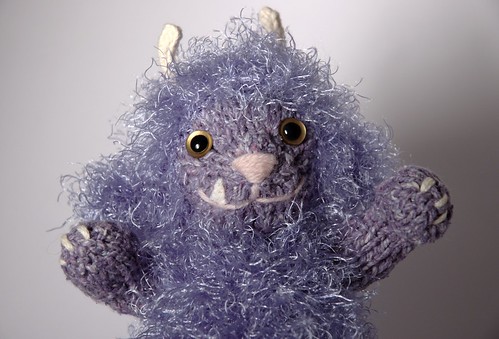
I decided to abandon the Halloween outfit idea, because my enthusiasm for it was waning only half-way through the first try. I was far too in love with the monster I had been knitting, so I finished that instead. I don't have the time to publish it as a new pattern (besides, I've put out a lot of new ones lately), so I'm going to give you some basic directions on how to make your own Fuzzy Monster! This is a project that can only be improved by applying your own creativity, so read what I did, then go wild!


First, download the Fuzzy Lamb pattern if you don't already have it (Ravelry, or direct).

Next, materials:
25 g of eyelash or fuzzy yarn, 25 g of coordinating smooth yarn (I used Bernat Eyelash yarn, and some cotton yarn), a small amount of yarn for the nose, some white yarn for horns and claws, a small amount of white felt, 4 mm (US size 6) knitting needles, two 4 mm dpns or a crochet hook, two safety eyes or buttons, stuffing, a darning needle, hand sewing needle and white thread

Work the arms and legs in the smooth yarn. You can vary the length by adding or subtracting rows after row 14. Work the body and ears in the fuzzy yarn. For the head, use the fuzzy yarn for the main colour, and the smooth yarn for the contrasting colour.

Once the head is done (eyes on, nose & mouth embroidered), cut teeth from the white felt and sew onto the face (or embroider them if you don't have felt). Assemble the rest of the toy. Embroider claws on hands and feet.


For the horns, on the dpns knit 2 short lengths of 4 stitch I-cord with the white yarn. I made mine 7 rows long before casting off. Sew the cast-off edge of the horns to the head, and secure the yarn ends. If you don't know how to knit I-cord, try crocheting some horns.

Finally, head your monster in the direction of the nearest small village which requires terrorizing!


P.S. If you're short on knitting time, just whip up some mini aliens to pop into the treat bags of special little ones.