
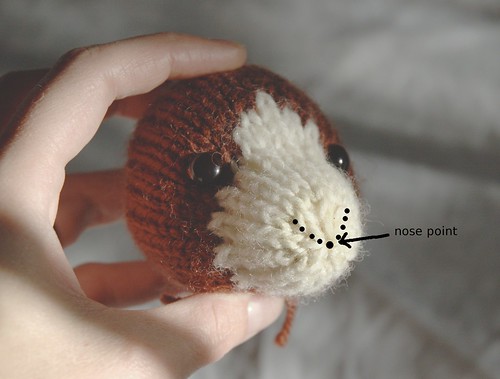
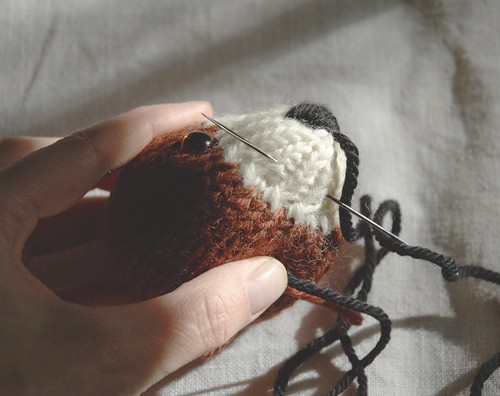
Step 1: Head knit, stuffed, sewn closed, and eyes attached. I've also done a little shaping as described in this blog post. The columns of knit stitches make a good guide to follow for the shape of the nose, as they make a v-shape as they're gathered in at the nose point.
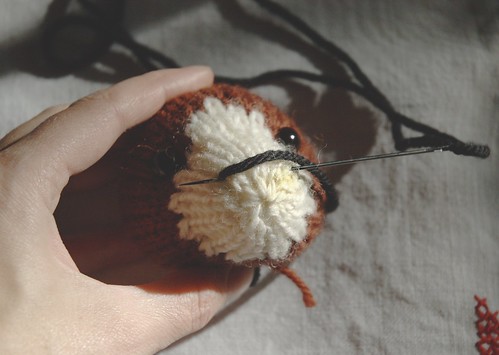
Step 2: Insert the needle with yarn from the bottom centre of the head, and have it emerge about a third of the distance between the nose point and the eye. (A long sharp needle with a large eye makes the embroidering much easier). Pull yarn through, leaving a short tail on the bottom of the head.

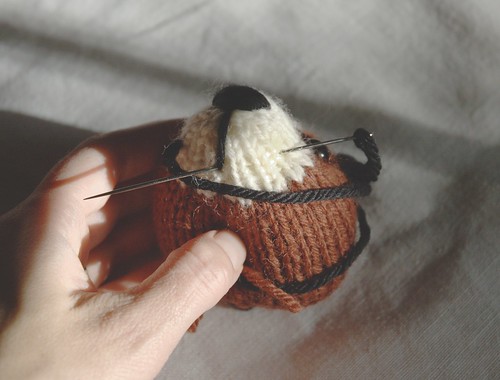
Step 3: Insert the needle on the opposite side of the head, trying to get it as symmetrical as possible (this often takes a few tries) and have the needle emerge back on the first side, just below where you started. Pull yarn through, but not too tight or the nose will pucker.
Step 4: Continue as in Step 3, following the lines of knit stitches towards the nose point. Each stitch should be slightly shorter than the one above.
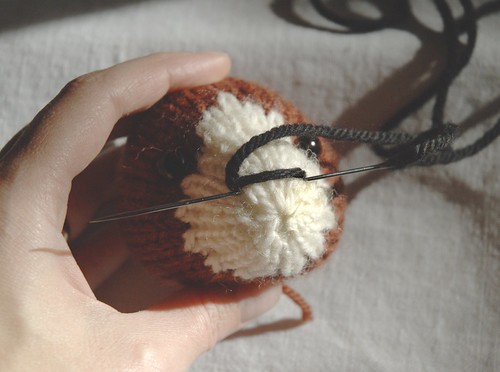
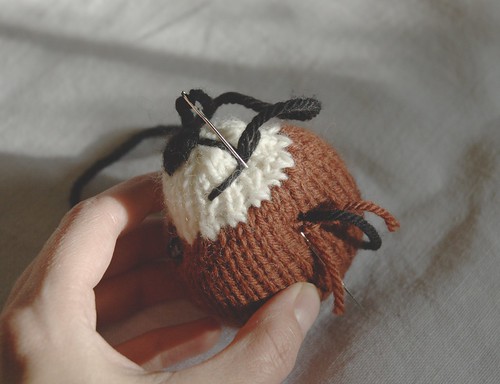
Step 5: Nearly there. If you find you haven't placed your stitches close enough and the nose is patchy, add extra stitches to fill in, or pull out what you've done and go back to do it better.*
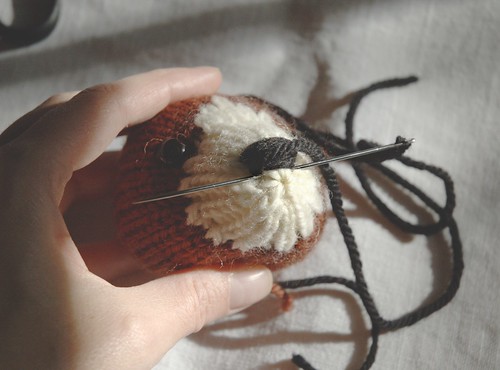
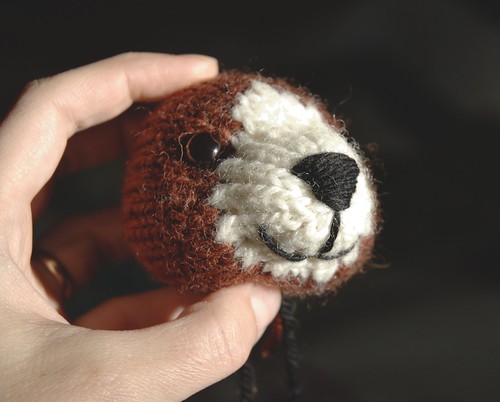
Step 6: One you've reached the nose point, which should be where you finish with the shortest stitch, have the needle emerge right in the centre of the nose point. Insert the needle directly below the nose to make a vertical stitch (however long you like). Then, have the needle emerge to the side of the muzzle (again, the size of the smile depends on your preference). Pull yarn through.
Step 7: Insert the needle on the opposite side of the muzzle, checking from the front for symmetry, and have it emerge at the bottom end of your vertical stitch. Pull yarn through, but not too tightly.
Step 8: Finally, insert the needle into the same place you just came out from, catching the horizontal stitch of the mouth by making a loop over top of it. Your needle should come out at the bottom of the head, where you started this business. Pull yarn through and snug up the loop holding down the smile.
Step 9: Knot yarn ends securely and cut off about 2.5 cm (1") long. Admire handiwork before getting on with the rest of the toy.
If you need a closer look at any of the images, just click on the photo and it will take you to the Flickr page where you can look at a larger size.
* Honestly, in spite of the large number of toys I've made, I often have to rip out the face and do it over. This is usually the result of impatience or lack of attention, so don't despair that a little practice will make it easy-peasy for you :)
9 comments:
You make it look soooooo easy, thanks!!
Wow thanks for an awesome tutorial, this is a very handy article :)
Love it thanks so much.
You do make it look easy... I guess practice makes perfect.
Great tutorial! And isn't it fun to finish up and look down and see all that little personality just popping right out at you?
Thank you so much! This helps me a lot!
fab tutorial and super cute pics :o)
This is wonderful! Thanks for the tutorial.
Would like to have a print format for hints and tutorials.
Where do I get the pattern for this cute little critter?????
http://media-cdn.pinterest.com/upload/235242780505660569_1g4bNMBO_c.jpg
Post a Comment