Tuesday, April 7, 2020

my grandma

It's been many years since I wrote about anything personal on here, but I have so much I want to say about my grandma, who was very special to me. All my life she was a major inspiration for my creativity, so I thought it appropriate to share some of that story here.

My grandma, Dorothy Mitchell, passed away on March 30, after her fight against cancer. She told me once that she wanted to make it to 100, and she was so tough I really thought she could, but she missed her 95th birthday by several weeks. The quarantine meant that the only family who could be with her at the end was my mother (her oldest daughter). Family was always so important to my grandma, it breaks my heart that they could not surround her with their love and care in those last few weeks. I had meant to visit her in June, and now I can never see her again.


I have so many memories of my grandma, though. She was a quiet person, perhaps a bit shy (like me). She loved to garden, and read, and cook. She especially loved to make things, and when younger had worked as a home-economics teacher. She was accomplished at sewing clothes and all sorts of other useful things, giving them to family and friends, or selling them at church sales. She made quilts for her grand- and great-grand-children. I still have the two she made me when I was a child, tattered and well-loved after so many years. She was also very good at knitting and crochet, and the toys she made me were some of my favourites (perhaps inspiration for my future career?) I loved her drawings too. They were sweet and full of character, and much better than I think she gave herself credit for.


My grandma's presence accompanies so many of my favourite childhood memories. As a child I lived in the same small village where my grandparents lived, and where my Mom has lived most of her life. We visited my grandparents regularly, and their house felt as much like my home as any place I've ever lived. Their property was quite large for being in town (about an acre, I think), with many gardens and trees. It felt like a whole world to explore when I was very young. There was a play house tucked away in one corner, and if we* asked nicely, my grandma would give us bits and pieces to decorate and play with. In good weather, she would make us a picnic lunch - usually peanut butter and jam sandwiches with grapefruit juice. We drank the sour juice quickly, before eating the sweet sandwiches. My grandparents had a huge vegetable garden, and we could pick what we liked to eat, if we were careful. I could quite often be found amongst the carrots, sometimes not even bothering to wash them before munching them down. All along one side of the garden were raspberries canes, and we spent many summer mornings picking buckets of berries, eating all the biggest ones, of course.

The house seemed so large too, when I was young (my mom is one of six siblings, so they needed the space growing up). My favourite place was the "breakfast room" just behind the kitchen. It seemed to be always sunny, and was where my grandma kept all her sewing and craft supplies. There was a bench around the table there, and inside the benches were all sorts of things we could use to make whatever we could imagine. We stuck everything together with flour-paste we'd mix up in old plastic mugs. I have so many memories of the big front room too, which was both dining and living room. There was a large table at one end, to seat as much family as possible. Family dinners were usually some sort of roasted meat, with plenty of garden vegetables and salads, followed up by chocolate cake or cookies. At the other end of the room there was variety of chairs and a sofa facing the fireplace, perfect for the adults to sit around and chat after family dinners. The kids loved picking through the basket of wind-up toys, getting as many going at once as we could. Around the walls were paintings and knickknacks, made by family or passed down from previous generations.

I wish I could have known her better, but when I was a child, she was my grandma: a figure to respect and admire, who would always care for me, and sometimes scold me when I deserved it. I never moved back home after I left at 19, so my opportunities to know her as an adult were few. I would talk with her when I was home about the things we both enjoyed, and hear stories from other family members. I think perhaps I am a lot like her in some ways, although our lives are very different. She will always be a part of me, and I will do my best to keep my memories of her sharp and bright and full of love.

P.S. I want to add more photos here, but don't have any. Sometimes you forget to take photos of the things you think will always be around.

*We, in the above story, refers to myself and my siblings

Friday, February 28, 2020

Bunimals Modifications

Bunimals: Simple toys with many possible modifications

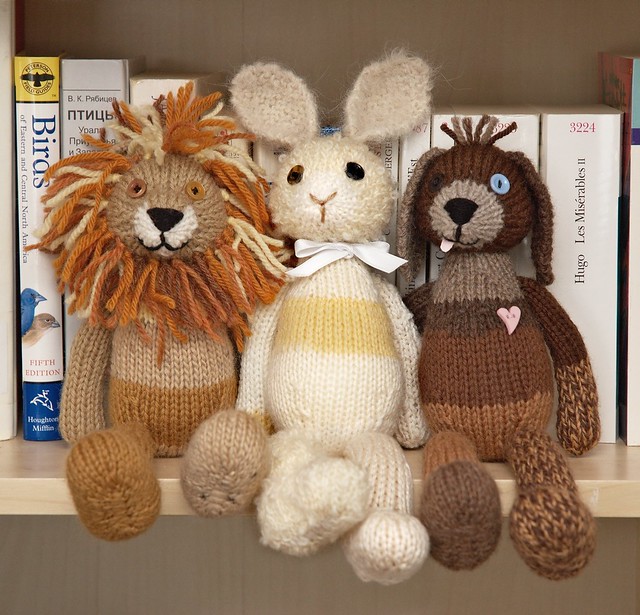
My new toy pattern, called Bunimals (bun+animals), was intentionally designed to be easy to modify into other types of animals. The pattern includes a variety of shapes with the ears and other appendages, while all the other details are kept as simple as possible. This way you can easily modify the pattern by changing the yarn colour or texture, mixing and matching the pieces, or making small alterations to the pieces provided, such as adding or removing length.

One simple modification is to change the yarn colour to better match the animal you want to make, such as using black and white to change the robin into a penguin. Another is to use the frog leg instructions to make legs to add to the other animals.

A more involved modification I tried was to use chunky weight yarn and 5 mm needles to make a larger toy. I used about 75 g of a single colour to knit the seal toy, and it turned out about 50 cm around and 10 cm tall (20"x4"). To make any of the two-colour designs in this way, make sure you have about 60 g of the MC and 15 g of the CC. You’ll also want safety eyes that are 15-18 mm in size.


Below I’ve described a few of the modifications that I imagined when designing the pattern (two I knit, the others I sketched for you), but I hope you use your creativity to make many more!


Cat pattern → Squirrel or Fox
To create a squirrel or fox from the cat pattern, choose a reddish-brown or orange yarn for your main colour (MC), and white for your contrasting colour (CC). Then just knit the pieces as written. I also used a fringe/eyelash yarn to knit the tail, adding a few extra rows because the gauge of the fringe yarn is different from the worsted weight yarn. I omitted the bit of CC at the end of the tail to make my toy look more like a squirrel. Embroider a small nose and a happy mouth.


Frog → Seal
To make a seal, you’ll need 50 g of white or grey yarn. Knit the whole body in your colour of choice. Then knit four leg pieces, but leave them un-stuffed. Two of these will be attached at the sides of the face as front flippers. To make the tail flippers, fold the other two leg pieces in half lengthwise, then place them on either side of the seam at the centre-back. Make sure the folded side faces up, and that you catch all the layers as you sew them onto the body. Embroider a V-shaped nose and wider mouth.


Mouse → Panda
To make a panda, you will need 40 g of white for your MC and about 10 g of black for your CC. Knit the body all in white. Before attaching the eyes, embroider small eye-patches with some black yarn, using a duplicate stitch technique. Knit the ears in black, and omit the pink duplicate stitch on the front. If you have enough black yarn, knit the legs from the frog pattern, and add them to the toy. Embroider a medium-size nose and a downward facing mouth.

Mouse → Koala
To make a koala, use grey for your MC and white for your CC, then knit the pieces as written. Embroider the front of the ears with your white yarn (if you have some fuzzy white yarn for this, even better). Embroider a large nose, positioned slightly above the centre of the eyes. A simple mouth works well for this toy.

Rabbit → Dog
To make a dog, use a lighter brown yarn for your MC and white for your CC. If you like, use a dark brown or fuzzy yarn for the ears. Knit the body and ears as written, but exclude the tail. Attach the ears to the head so they hang down beside the face. Or, attach the ears pointing up, then fold them forward and sew in place.  After you embroider the nose and mouth with black yarn, embroider a little pink tongue.
For a tail, CO 10 sts with whichever yarn colour you like. Work in stockinette until the tail is about 7 cm (3”) long. Then cut the yarn, thread the end through the stitches, and pull tight to gather. Sew along the tail seam, but don’t add stuffing, so the tail will remain flexible. Attach the tail to the centre-back of the toy body.

Robin → Chick or Ducking
To make a chick or ducking, you’ll need 50 g of light yellow yarn, plus about 5 g of orange yarn. Knit the body, wings, and tail from the yellow yarn. For a chick, knit the beak from orange yarn. For a duckling, knit a second “tail” piece from orange yarn to make a bill, and add a bit of stuffing. Assemble the toy pieces as described in the pattern.

I look forward to seeing all the adorable toys you knit from this pattern, and please consider sharing any inspiring modifications you create.

Bunimals

I have an adorable and silly new pattern for you today!

Bunimals are bun-shaped animal toys with cat, frog, mouse, rabbit, and robin variations. Each toy uses about 50 g of worsted weight yarn, and they knit up super fast! I designed this toy to be easy to embellish and modify (look for upcoming blog post on this), and a fun way to use colourful or textured yarns.


You can also get the pattern in two versions: knit flat or circular. While I do design most of my toy patterns to be knit flat, because it allows more knitters to be able to make them, this toy design would obviously work well when knit in the round. On Ravelry, simply select the version you want to download. On LoveKnitting, you need to purchase each version separately - flat or circular (I don't like this method, but it's what was allowed on the site. If you buy one version and would like the other as well, please email me).

I look forward to seeing what everyone will make from this new pattern! Please add your projects if you're on Ravelry, so others can appreciate them too.

Monday, November 26, 2018

silky seal pattern

I have a new pattern available for the holidays: a sweet, cuddly seal toy! A slightly different version of this pattern was published a couple years ago, but I've updated it, and you can get it for free until the end of the year (December 31, 2018).


The original toy was knit with Berroco Modern Cotton (in colour 1623), which my 7-year old tells me is very soft and snugly. He's added the toy to the menagerie on his bed, and I regularly find the seal tucked under his chin in the morning. For the second toy, I wanted to try making a smaller size with DK weight yarn, because I know this weight is more common than worsted in some places. I improvised with yarn from my stash, holding together one strand of wool/arcylic sport weight yarn, with one strand of mohair/silk lace yarn. The result gives a lovely soft halo, and both yarns are relatively easy to find in most yarn shops. If you can find a fuzzy DK yarn, even easier for you!


While the head and body are fairly easy to knit, the flippers require some concentration. They are small, though, and quickly accomplished. The sewing-up may test your skills a bit, but a fuzzy yarn is especially forgiving of slightly messy seams. Make your seal extra adorable with oversized black safety eyes! Once the pieces are finished, the final toy comes together quickly, with only the head and front flippers to attach. For an extra cozy seal, you can add a little scarf cut from felt, or knit one from the instructions below. This isn't shown in the pattern photos, but is so easy, I'm sure you can manage ;-)

Simple Garter Stitch Scarf for a toy
Materials: 8-10 g of DK or worsted weight yarn, pair of 3.5 mm (for DK) or 4.5 mm (for worsted) straight knitting needles, tapestry needle
Gauge: not really important, as long as you like it

Cast on 8 sts. Knit in garter stitch until scarf measures 30 cm (12"), or desired length. Cut yarn, and weave in yarn ends. Optional: add a fringe at each end by knotting on extra lengths of yarn.


Thursday, March 29, 2018

mystery knit-along 2018

I have a super fun new toy for this year's Mystery Knit-Along, so I'll hope you'll join us on a mysterious knitting adventure!


This year's toy is based on one of my previous designs, but with an unexpected twist. Also, the main toy will have a small companion toy, which is a completely new design. Overall the pattern is advanced-beginner to intermediate level, and uses techniques similar to my other toys. One toy uses worsted weight yarn on 4 mm (US size 6) knitting needles, and the other uses fingering weight yarn on 2.75 mm (US size 2) knitting needles. All pieces are knit flat and then seamed and assembled, but an experienced knitter would be able to modify most parts to be knit in the round, if desired.

If you haven't participated in one of my past mystery knit-alongs (MKAL), the way they work is fairly simple. The knit-along will begin on Thursday, April 26, and run for 5 weeks, with the final clue on May 24. Each week you'll receive a portion of the pattern, which should take one to two evenings to knit. The pattern file will always contain the previous clues, so you won't miss anything, even if you start late. As for the previous couple of MKALs, I will also include a separate file of photos, if you need some guidance on knitting and assembling the toy pieces.

Getting started is easy! First, you purchase the pattern from Ravelry. It's only available from my Ravelry shop because that's the easiest place from which to send everyone updates. Before the MKAL starts on April 26, the pattern will only contain the materials list, and a condensed version of the details you're reading here. (Hint: the pattern will be offered at a discount during the KAL, so even if you can't participate, you can get the lower price now and knit the toy later).

Second, prepare the materials you'll need for the toy. This year's materials list leaves a fair bit of room for using what you have, and being creative, which I hope will appeal to a lot of knitters. The list will also have suggestions for what to use if you need to buy yarn, so you don't have to purchase too much.

Third, decide how you want to participate. If you want the full experience, join my Ravelry group, where I host a forum specifically for the MKAL. This is a great way to share what you're knitting, and get help and encouragement, if you need them. Other options are to follow my Facebook page, where I'll post weekly updates on my progress. Third, you can follow me on Instagram, where I'll also post photos of my progress, and you can use the hashtag #fuzzymkal to share your own mystery toy. Of course, you can just knit each clue as they're available, as there's not obligation to share.

As some of you may know, I'm taking a break from designing next year to pursue some other interests. Depending on how that year goes, I may or may not return to designing knitted toys. So, it's possible this will be my last Mystery Knit-Along. This makes me sad, as this is easily my favourite part of designing toys, but perhaps it will encourage more people to participate this year. Please share this post with anyone who loves knitting cute things, and encourage them to join!

Friday, December 8, 2017

fancy collar accessory

Fancy Collar


This pattern makes a charming collar that can be attached to other garments such as cardigans or pullovers, to make them into a fancy holiday outfit, or it can simply be used as an accessory, to combine with multiple outfits. I’ve given two sizes of neck width, to make it easier to match to the garment of your choice.

It will save you time and confusion to read the entire pattern first, because there are several possible variations of this accessory. Reading everything will help you choose the options you need to achieve good results on your first try.

Left: size large with wide neck, knit with worsted weight yarn.
Middle: size medium with narrow neck, knit with DK weight yarn.
Right, size small with wide neck knit with fingering weight yarn.

Yarn and Notions
10-15 g of yarn in colour of your choice, a few straight or safety pins, narrow ribbon or extra yarn or button (plus needle and thread to attach) to join collar ends (optional), crochet hook (optional)
Needles: use a pair of straight needles in the size required for your toy/yarn (see below)
Size Small: with fingering weight yarn and 3 mm (US size 2.5) straight knitting needles, collar will fit my regular 8-9” tall toys
Size Medium: with sport or DK weight yarn and 3.5 mm (US size 4) straight knitting needles, collar will fit my Wood Elf Doll or 10-12” toys
Size Large: with worsted weight yarn and 4.5 mm (US size 7) straight knitting needles, collar will fit my large 12-16” toys

Note: For a non-lacy collar, you can work the yo stitches as m1; but, the collar will be less stretchy. 

Instructions
CO 52 sts.
Row 1 (WS): Knit.
Row 2: k1, [k1, yo, k1, ssk, k2tog, k1, yo] x 7, k2.
Row 3: k2, [k2, k2tog, k3] x 7, k1. (45 sts)
Row 4: k1, [k1, yo, k1, s1, k2tog, psso, k1, yo] x 7, k2.
Row 5: Knit.
Row 6: k1, [k2, ssk, k2] x 7, k2. (38 sts)
For wide-neck collar, bind off now.
For narrow-neck collar, work next 2 rows.
Row 7: Knit.
Row 8: k3, ssk, k8, ssk, k8, ssk, k8, ssk, k3. (34 sts)
Bind off.

Finishing
If attaching the collar to a cardigan, pin in place, matching ends at edges of button bands. Then use yarn ends to sew the inner edge of the collar to the collar of the cardigan. I used back-stitch, working through the edges of collar and cardigan, to get a tidy line of stitches on the inside. Weave in ends on WS of the collar.

Collar attached to neck of cardigan.
If attaching the collar to a pullover, stitch the collar to the garment at centre front and back, and each shoulder, but leave the rest of the collar loose. If you sew it on all the way around, it may be difficult to get over your toy’s head.


If using the collar as an accessory, choose one of the following methods to join collar ends at centre-front.
Button: For a collar that stays attached in front, simply match up top corners, and sew button on through both layers (the toy heads are squishy, so you should still be able to get it on). For a collar that can open, sew button to one corner. On opposite corner, make a button loop from a length of yarn, or crochet a button loop.
Button with a crocheted loop.
Ribbon or Yarn: Attach a 10 cm (4”) length of ribbon or yarn to each top front corner, or make single-crochet ties with extra yarn. For extra fun, attach beads or bells to the ends of the ties.

Single-crochet ties, with bells added to ends.

Abbreviations
[ ] x N = repeat sequence in brackets N times ("to end" means to repeat until the end of the row)
CO = cast on
K = knit
k2tog = decrease 1 by inserting needle from front to back into next 2 sts on left-hand needle, then knit together
m1 = increase 1 by picking up loop between stitch just worked and next stitch, from front to back, and knit into the back of this loop
P = purl
psso = pass slipped stitch over stitch just worked, to decrease 1 stitch
RS = right side
s1 = slip one stitch from left-hand needle to right-hand needle, making sure not to twist
ssk = decrease 1 by slipping 2 stitches purl-wise, slip back to left-hand needle, then knit slipped stitches together
st or sts = stitch or stitches
WS = wrong side
yo = yarn over: bring yarn forward, then over the needle to the back again. This makes a loop which can be worked as an extra stitch on the next row

Pattern links
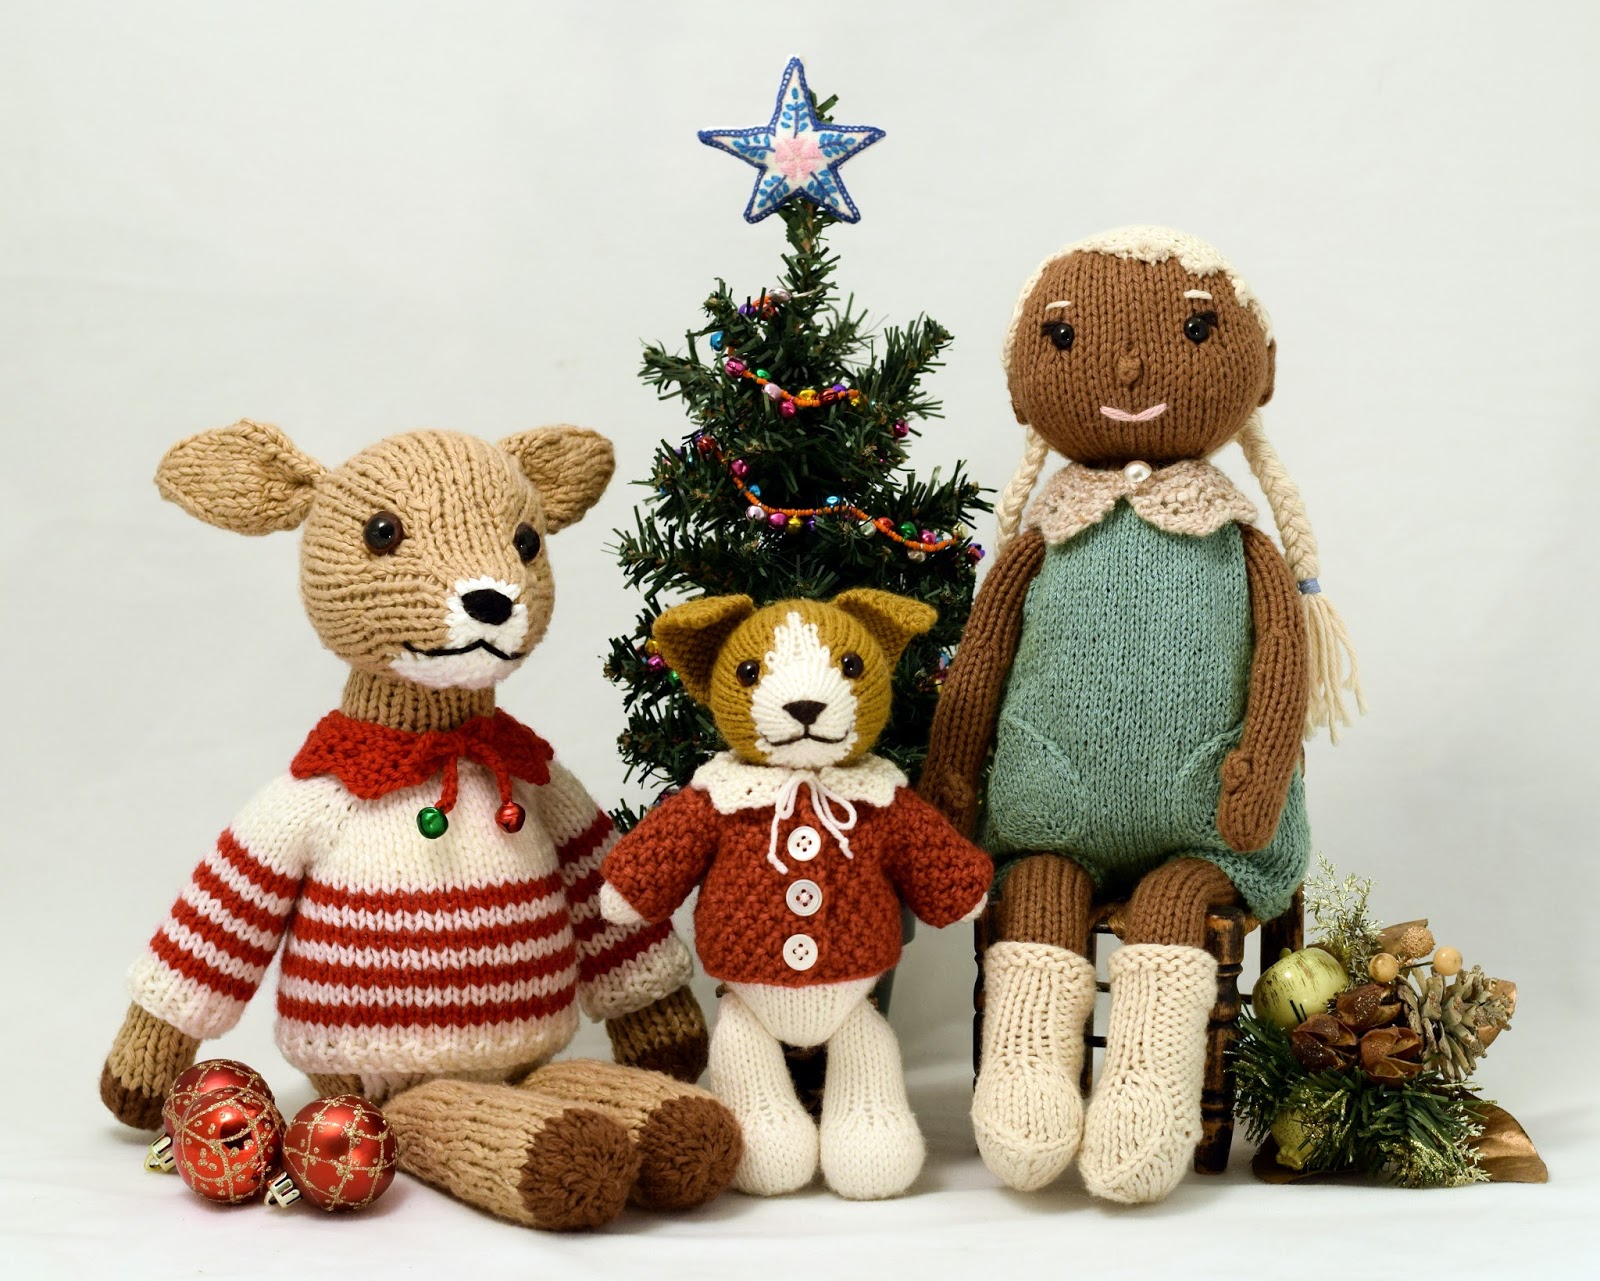
Fudge the Dog, Cardigan from Polar Bear, Wood-Elf Doll, Deer from Backyard Bandits, Pullover from Breton Shore Outfit

Thursday, December 1, 2016

polar bear pouch

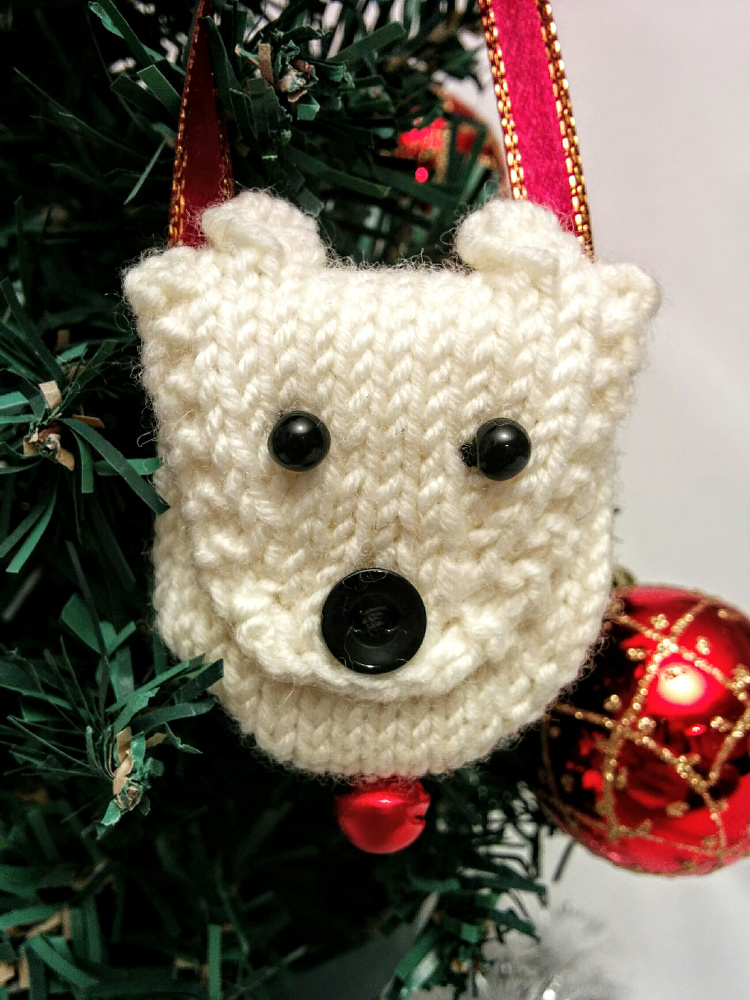
I have a new winter holiday pattern for you this year: a little knitted pouch, with a flap shaped as a polar bear face! This quick knit makes a sweet tree ornament, or it can be worn as a necklace. Hide a surprise or a treasure inside to make it extra special!
You need to know how to knit in the round, increase, decrease (ssk and k2tog), and make bobbles. An intermediate-level knitter should be able to knit and finish at least one of these in an evening. But don't be intimidated if you're more of a beginner: this project is so small, it's a great way to learn a new skill!

You will find the full pattern below, or download the PDF from Ravelry. Happy holiday knitting!

P.S. If this project is not your style, try one of my other free holiday patterns: Holiday Mice, Inuk and Seal, Reindeer finger-puppet, Mini Pookies. (Ravelry links: Holiday Mice, Inuk and Seal, Reindeer finger-puppet, and Mini Pookies.)


Friday, November 11, 2016

kichidi stew and naan bread

I enjoy cooking tasty, healthy food for my family. It's fun to learn new recipes and techniques, and introduce my kids to a wide range of foods. However, sometimes it's a little tricky to find new recipes which we all enjoy.

We're mostly vegetarian, meaning we don't eat red meat or poultry at home, although we occasionally eat fish, and are more flexible when travelling. As well, I have a digestive intolerance to onions and garlic (try explaining that one in restaurants), so I often have to get creative with savoury dishes. This makes it even more satisfying to find a new recipe that we all like, and which I don't have to modify for our restrictions.

If you try out these recipes, I hope you and your family enjoy them as much as we did! Both these dishes take time and some preparation, so they're good for a winter weekend spent at home.


Kichidi Stew

You need to prepare the squash earlier in the day, or the day before. The stew itself takes about 45 minutes to cook, and serves 4-6.

1 medium butter-nut squash (or other orange-flesh winter squash), about 1 1/2 pounds or 700 g
2 tbsp ghee or butter
1/2 - 1 tsp garam masala
1/2 - 1 tsp ground cumin
1 tbsp grated fresh ginger
1/4 - 1/2 tsp chili flakes
8 cups (2 L) water
1/2 cup (125 ml) brown basmati rice
1/2 cup (125 ml) red lentils
salt, to taste
1 tbsp lime juice
2 tbsp chopped fresh cilantro/coriander

1. Preheat oven to 375 F. Remove stem from squash, cut in half length-wise, and scoop out seeds. Place cut side down on a baking dish, and bake for 30-45 minutes. Squash should be soft and caramelised. Let squash cool, then scoop out cooked flesh and mash or press through a food-mill.
2. Melt the butter/ghee in a soup pot at medium heat. Add the spices (the amounts depend on how much seasoning you enjoy. You can always start with a little, and add more at the end), and simmer in the butter for about a minute, until they become fragrant. Add the water and increase the heat to medium high. Once the water is boiling, add the rice, cover with a lid, and reduce the heat to medium low. Simmer the rice for about 20-25 minutes, until tender.
3. Add the red lentils, and cook for another 5-10 minutes, until they are soft.
4. Stir in the cooked squash and season with salt to taste. Thin with hot water if it's too thick. Warm through if necessary.
5. Drizzle with lime juice and garnish with cilantro to serve.

Naan Bread

I have no idea how authentic this recipe is, but it worked for me, and was very good. The bread takes about 1.5 hours to make, but if you time it right, will be ready at the same time as you finish the stew.

1/4 cup milk, heated until luke-warm
2 tsp bread yeast
1 tbsp vegetable oil
1/4 cup plain yogurt (not skim)
1 egg
1/2 tsp salt
2 cups unbleached flour, plus a little more for dusting/rolling
2 tbsp butter, melted

1. Place the yeast in a small bowl, and add the milk a little at a time, stirring gently. Set aside for about 10 minutes.
2. Whisk together the oil, yogurt, egg, and salt in a large bowl. Add the milk and yeast mixture. Slowly add the flour until you get a soft dough. Kneed on a lightly floured surface for 5-10 minutes, until the dough feels smooth.
3. Place dough in a floured bowl, cover with a damp cloth, and let rise in a warm place for about an hour, or until doubled in size.
4. Preheat your oven to 450 F, or as hot as it will get. Remove the dough from the bowl, kneed gently to form a ball, then cut the ball into 4 equal pieces. Form each piece into a ball, and let rest for a couple minutes. Pull or roll each ball of dough into a circle about 7 inches across and 3/8" thick.
5. Place a couple baking sheets in the oven for a minute to heat up, then gently place the breads on the pans (I found I could get 2 per pan), and bake for 3-4 minutes - until brown on the bottom and puffed.
6. Remove from the oven, and turn on the broiler to high. While this is heating, brush the tops of the bread with the melted butter. Return the breads to the oven, just under the broiler, and toast until golden brown on top.

Enjoy warm naan bread with the stew above, or with your favourite curry!

P.S. The give-away contests from last week are still open until November 15, so don't forget to comment if you'd like a chance to win! Patterns, kit, magazine, toys.

Saturday, November 5, 2016

10th anniversary give-away: Holiday Mice

I opened my first shop on Etsy, November 5, 2006. At the beginning, I was just selling toys I had knit, not patterns. Those only came when other knitters saw my toys, and wanted to knit some themselves. It's been a crazy, fun adventure of yarn and cuteness since that day! Sometimes I miss knitting toys for my shop. I'm so busy designing now, I can only manage to make extra toys for family and friends.

One of the first toys I made for my Etsy shop.
My designs have changed a bit since then!

For my final give-away contest, in honour of those first toys I knit, you could win a pair of Holiday Mice! The winner will be free to choose the colour of the mice, and the style and colour of the hats. You could even ask for a wee Santa Mouse, like this one by the Yarn Harlot (I'm still blushing a bit over that). I will pick the closest yarn I can from my stash. Hopefully, I will have them done and off to the winner in time for winter holidays!

Holiday Mice: what colours would you choose?

If you would like a chance to win this prize, please leave a comment below, with a way of contacting you (email, Ravelry name, etc. I've been asking for this because usually Blogger does not give me this information when you leave a comment). I will do my best to ship to anywhere in the world. I will draw a random winner on November 15.

Best of luck, and thanks for visiting me this week!

Friday, November 4, 2016

10th anniversary give-away: Knit and Crochet Toys magazine

For my third give-away, you could win a copy of Knit and Crochet toys magazine! I contributed two patterns to this special issue, and in addition to those, there are over 20 adorable and fun patterns to knit or crochet. You can check out the magazine here, and see all the patterns over on Ravlery.


As before, if you'd like a chance to win this gift, please leave a comment on this post, including a contact method (email, Ravelry name, etc).

P.S. I didn't mention on the previous post that I'm willing to ship to just about anywhere. If for some reason you win, but I can't ship to your country, I hope we can figure out an alternative prize.

Thursday, November 3, 2016

10th anniversary give-away - Puss in Boots kit

Today I have a kit plus pattern to give-away! My Puss in Boots pattern was originally published in Knit Now magazine, and came with a kit, containing enough yarn to knit one toy. If you'd like a chance to win this kit and pattern, please leave a comment below, including a contact (email, Ravelry name, etc). I will draw a random winner on November 15, so you have lots of time to enter!


Don't forget to check yesterday's post, if you'd like a chance to win a free pattern of your choice. Plus, more give-away contests to come over the next 2 days!

Wednesday, November 2, 2016

10th anniversary give-away - Patterns

In addition to the free teddy pattern I mentioned yesterday, I will be having a few give-away contests this week. I'll announce each separately, and you can enter all of them, or just the ones you're interested in. To enter, please leave a comment here or on my Facebook page. If you comment in both places, you'll have 2 chances to win, since it would be too hard to sort out who's who. If you do comment here, please include a way for me to contact you (email address, Ravelry name, etc). I'll draw for all the give-away gifts on November 15, so you'll have lots of time to enter.

Today, the give-away is for a copy of one of my knitting patterns. I'll choose 10 winners (one for each year, of course), and you can pick whichever design you like. You can see all of them in my Ravelry store. (Please note that I have a number of other designs which I cannot sell myself, so the store is the best place to see what you could choose). I've even been working on my newest pattern, the Wood-Elves, so it's ready in time for the give-away draw.

Please check back later in the week, to see what else you could win! Or just come to see photos of cute knitted toys, I don't mind ;)


Tuesday, November 1, 2016

10 year anniversary celebration

I'm resurrecting this long-quiet blog, to announce a special 10 year anniversary event!

It has been ten years since I opened my first shop on Etsy, and I wanted to do something special to show all my lovely customers how much I appreciate you. To start off a week of fun give-aways, I've updated my very first pattern: a teddy with a sweet cardigan. You can download it for free, for the whole month of November! I'll announce a new prize each day this week, both here and on my Facebook page, so be sure to check back later! More details will be given each day, but the give-aways will remain open for a while, so don't worry about missing them.

Teddy Pattern
 I never thought I would still be designing knitted toys ten years after I started, as it was just something to keep me busy between jobs. I've learned so much over the years, tried lots of interesting things, and I am still enjoying creating cute toys for people to knit. I have some projects in mind for the next year or two, so if you enjoy my patterns, be sure to visit and see what I'm up to!

Saturday, December 12, 2015

happy holidays sale

Happy Holidays Sale

From December 12-27, enjoy 35% off selected patterns! A new pattern will be added to the sale each day for 12 days, so check back to see if there's something you'd like! I'm starting the sale with this well-loved Pug in Anorak pattern (Ravelry, Etsy), in honour of my son's 7th birthday. (please note that Ravelry discounts are done at check-out)


Here's the full list of patterns that will be on sale, with links to the Ravelry pages. Here's a link to my Etsy shop, if you'd rather buy the patterns there.

Dec 12: Pug with Anorak 
Dec 13: Santa Reindeer 
Dec 14: Beaver with Sweater Coat 
Dec 15: Polar Bear 
Dec 16: Dragon and Friends 
Dec 17: River Otter 
Dec 18: Chipmunk 
Dec 19: Tiger 
Dec 20: Owl and Baby 
Dec 21: Pirate Hippo 
Dec 22: Sloth 
Dec 23: Savannah Chaps


Saturday, November 21, 2015

holiday pattern round-up

Instead of a new holiday pattern this year, I wanted to share with you all the free patterns I've made in previous years. Perhaps you missed something in the past, your knitting skills have improved and you want to try new things, or you'd like to see an old project in a new way. Whatever the reason, I hope you find an hour or two to try out one of these adorable patterns. 

(Links are below, not on the individual photos)


From left to right, along to top row:

1. My most popular holiday pattern, these Mice are easy and quick to make. They can be toys to tuck into a stocking, tree ornaments, or even a gift topper. Knit them from bits of left over yarn, in any weight from fingering to worsted.

2. A close second, Mini Pookies are quirky and sweet. They're the perfect size for a Christmas tree, a child's hands, or even add a bit of cat-nip for your favourite kitty.

3. If you'd rather knit an accessory, this free hat pattern is easy and fast. Two 50 g balls of worsted yarn in your toddler's favourite colours, a few hours of knitting, and you'll have a toasty warm gift!

From left to right, along the bottom row:

4. If you know someone who loves pandas as much as my little boy, this toy is perfect. You can make a little pocket friend, or a finger puppet!

5. This reindeer finger-puppet is very similar to the panda, and more seasonal. If you don't mind a bit of hand-sewing, you can make the antlers from felt.

6: A special ornament set for those who love the North, this pattern makes an adorable baby seal and a little Inuk (person). Dress your Inuk in your favourite colours, and make the hair long or short. You can also have fun with a bit of embroidery on the coat.

And if these ideas are not enough, here's a few more:


7. One of my oldest patterns, these little stuffed trees are a great way to use up little bits of left-over yarn.

8. Have you wanted to try felting, and have some bits of wool yarn you're not using? Try making some felted star ornaments.

9. Finally, for those friends or relations who don't appreciate seasonal decorations, maybe you could knit some Mini Aliens!

For even more ideas, have a look at this similar post from Knitted Bliss.


Tuesday, May 19, 2015

Wee Panda Toy and Finger Puppet


In honour of my birthday today, I'm sharing a new free pattern with you! This one was originally published in Knit Now magazine last year. I've made a few small changes to that version, and added a finger puppet body. These tiny toys are great as a last minute gift. You can turn them into back-pack accessories, a key-chain, or just give them as a special pocket-friend. (Tip: you can also ignore the colour changes, and so make the toy a bear or hamster instead. Or, if you own the Wee Wuzzies pattern, you can add their heads and tails to the finger puppet body, and make a whole handful of cuteness!)

I hope you all enjoy making a Wee Panda or three! 


Materials
9 g of white (MC) and 6 g of black (CC) DK weight yarn, pair of 3.25 mm (US size 3) knitting needles, pair of black 6 mm safety eyes or beads, polyester stuffing, tapestry needle
Gauge 
5.5 sts and 8.5 rows = 2.5 cm (1") measured over st st
Size 
5.5 cm (2¼”). The finger puppet will fit a child or small adult hand.

Notes
Use a long-tail, or similar, cast on. Leaving a 25 cm (10”) yarn end when casting on will give you a convenient length of yarn for seaming and assembling the toy.
Intarsia colour changes are marked by the yarn colour preceding each set of stitches. Use mattress stitch for seams, and whip stitch to assemble toy pieces.
If you don’t want to work the intarsia eye-patches, they can also be embroidered with duplicate stitch on the finished head.

Toy Body 
Begin at bottom. With MC, cast on 6 sts.
Row 1: Purl.
Row 2: K1, [m1, k1] to end. (11 sts)
Row 3: Purl.
Row 4: K1, [m1, k1] to end. (21 sts)
Row 5: MC p7, CC p1, MC p5, CC p1, MC p7.
Row 6: MC k7, CC mb, MC k5, CC mb, MC k7.
Continue in MC.
Row 7-12: Work 6 rows in st st.
Break off MC, change to CC.
Row 13: Purl.
Row 14: K7, mb, ssk, k1, k2tog, mb, k7. (19 sts)
Row 15: Purl.
Row 16: K2, [ssk] x 3, k3, [k2tog] x 3, k2. (13 sts)
Row 17: Purl.
Bind off. With a length of MC yarn (or the ends from working instaria) sew down the edges of the bobbles, then knot yarn ends tightly together and trim short. Sew together cast-on edge, then sew up back seam, leaving bound-off edge open. Stuff body (you'll need to be careful when stuffing the body, so the black yarn ends from the bobbles don't show).

Finger Puppet Body 
Begin at bottom. With MC, cast on 16 sts.
Row 1-2: Beginning with a P row, work 2 rows in st st.
Row 3: MC p5, CC p1, MC p4, CC p1, MC p5.
Row 4: MC k5, CC mb, MC k4, CC mb, MC k5.
Row 5-7: Work 3 rows in st st.
Row 8: K5, ssk, k2, k2tog, k5. (14 sts)
Row 9-10: Work 2 rows in st st.
Break off MC, change to CC.
Row 11: Purl.
Row 12: K4, mb, ssk, k2tog, mb, k4. (12 sts)
Row 13: Purl.
Bind off. With a length of MC yarn (or the ends from working instaria) sew down edges of bobbles, weave yarn ends through the bobbles a few times, and trim ends. Sew up back seam, leaving cast-on and bound-off edges open.

Head 
Begin at back of head. With MC, cast on 7 sts.
Row 1: Purl.
Row 2: K1, [m1, k1] x 5, k1. (12 sts)
Row 3: Purl.
Row 4: K1, [m1, k1] x 10, k1. (22 sts)
Row 5: MC p8, CC p1, MC p4, CC p1, MC p8.
Row 6: MC k8, CC kfbf, turn, p3, turn, sk2p, MC k4, CC kfbf, turn, p3, turn, sk2p, MC k8. (this rows makes tiny bobbles for the ears)
Continue in MC.
Row 7-9: Work 3 rows in st st.
Row 10: MC k6, CC k4, MC k2, CC k4, MC k6.
Row 11: MC p6, CC p4, MC p2, CC p4, MC p6.
Continue in MC.
Row 12: K2, [k2tog] x 4, k2, [ssk] x 4, k2. (14 sts)
Row 13-15: Work 3 rows in st st.
Row 16: [k2tog] x 7. (7 sts)
Cut yarn, thread end through loops of rem sts, and pull tight to gather. Weave in yarn ends from intarsia sections. Attach safety eyes. Sew seam towards back of head, leaving an opening. Stuff head, smoothing and shaping as you stuff. Sew closed. Embroider nose and mouth. Sew head to the open bound-off-edge of the toy or puppet body.

Abbreviations 
[ ] x N = repeat sequence in brackets N times ("to end" means to repeat until the end of the row)
K = knit
k2tog = decrease 1 by knitting 2 together
kfbf: increase 2 by knitting into front, then back, then front of next stitch
m1 = increase 1 by picking up loop between stitch just worked and next stitch, and knit into the back of this loop
mb = Make bobble: increase 5 sts into next st (knit, purl, knit, purl, knit into this stitch), turn. P5, turn. K5, turn. P5, turn. Ssk, k1, k2tog, then, one at a time, pass first 2 sts over the last st on your right-hand needle, to get 1 rem st.
P = purl
RS = right side
s2kp = decrease 2 by slipping 2 stitches as if to k2tog, knit the next stitch, then pass the 2 slipped stitches over the knit stitch
ssk = decrease 1 by slipping 2 stitches purl-wise, slip back onto left needle, then knit slipped sts together
st or sts = stitch or stitches
st st = stockinette stitch
WS = wrong side


Kyr very kindly modelled the toys for me, 
so you can see how big they are compared to a 4-year old.

Friday, December 5, 2014

reindeer finger-puppet pattern

Here's a cute little project that you can make in those little bits of time you always have during the holidays: chatting with family at parties, waiting for a school pageant to start, watching Christmas specials with your kids for the 12th time.

It's a fairly easy knit, so if you can knit, purl, increase, decrease, and change colours, you should be fine! I've made the antlers from felt, but if you hate hand-sewing, and your kids are a bit older, you could use pipe-cleaners (chenille wires) instead. Wouldn't your children be so pleased to find one of these in their stocking?


Please note, this is a free pattern, and I haven't had time to get it test-knit. If you find a mistake, or have a question, please email me (barbara at fuzzymitten .com).
Materials
15 g of worsted weight yarn in light brown (MC), 5 g of worsted weight yarn in white (CC), pair of 4 mm (US size 6) knitting needles, two 4 mm (US size 6) double pointed needles (dpns), pair of 6 mm safety eyes or beads, stuffing, yarn to embroider the face, tapestry needle, brown felt plus hand-sewing needle and thread
Gauge
22 sts and 32 rows per 10cm (4˝) in st st
Size
8 cm (3”)


Body
CO 34 sts with MC.
Row 1: P6, bind off 8 sts, p6, bind off 8 sts, p6. (18 sts, the bound off stitches make the legs)
Row 2: K5, ssk, k4, k2tog, k5. (16 sts)
Row 3-7: Work 5 rows in st st.
Row 8: K5, ssk, k2, k2tog, k5. (14 sts)
Row 9-11: Work 3 rows in st st.
Row 12: K4, k2tog, k2, ssk, k4. (12 sts)
Change to CC.
Row 13-14: Work 2 rows in st st.
Bind off. Using a length of your MC yarn, sew the tops and bottoms of the feet together with a few whip stitches.

Arm (make 2)
With dpns and MC, cast on 3 sts. Work in I-cord for 5 rounds. Cut yarn, thread end through remaining stitches, and pull tight to gather.
If you don’t want to work the arms as I-cord, cast on 4 sts, and work in st st for 5 rows. Cut yarn, thread end through remaining stitches, and pull tight to gather. Then sew arm seam towards cast-on edge.

Head

Start at back. CO 6 sts with MC.
Row 1: Purl.
Row 2: k1, [m1, k1] x 5. (11 sts)
Row 3: Purl.
Row 4: k2, [m1, k1] x 8, k1. (19 sts)
Row 5-9: Work 5 rows in st st.
Row 10: k3, ssk, k1, k2tog, k3, ssk, k1, k2tog, k3. (15 sts)
Row 11: Purl.
Row 12: k4, k2tog, k3, ssk, k4. (13 sts)
Change to CC.
Row 13-15: Work 3 rows in st st.
Row 16: [k2tog] x 3, k1, [ssk] x 3. (7 sts)
Cut yarn, thread end through remaining sts, and pull tight to gather. Attach safety eyes or beads, or embroider eyes with black yarn. Sew seam, leaving an opening. Stuff head, then sew closed. Embroider a nose and mouth.

Ear (make 2)
CO 3 sts with MC.
Row 1: Purl.
Row 2: K1, m1, k1, m1, k1. (5 sts)
Row 3-5: Work 3 rows in st st.
Row 6: K1, ssk, k2. (4 sts)
Row 7: [p2tog] x 2. (2 sts)
Pass first stitch over second. Cut yarn, pull end through rem st, then thread yarn end along side of ear to cast-on edge. Sew cast-on edge of ears to head, then weave in yarn ends.

Finishing
Sew cast-on edge of arms to body, then weave in yarn ends on WS of body. Sew body’s back seam from cast-on edge to bound-off edge, leaving the bound-off edge open, for sewing to the head.
Make antlers from felt: cut out 4 pieces of felt using the photo below as your pattern*. Matching 2 pieces together, sew around outside edges with a blanket stitch. Sew antler base to the head, just above one ear. Repeat for the other antler. (Another method of making antlers is to use pipe-cleaners or chenille wire, but this is not recommended for young children)
Sew head to open bound-off edge of body. Weave in yarn ends. If you like, add a bow and jingle-bell.

*You should be able to click on the photo above, and then print it. I have tried to make the photo so that it will print at the correct size to use as a pattern for cutting out your antler pieces. But if it's not the correct size, just use it as a guide for the shape. All reindeer have different antlers anyway!

P.S. If you want to make a whole family of finger puppets, the body from the reindeer will work with any of the heads from my Wee Wuzzies pattern. You'll just need to knit it in the appropriate colours.


Abbreviations
[ ] x N = repeat sequence in brackets N times ("to end" means to repeat until the end of the row)
CO = cast on
K or k = knit
k2tog = decrease 1 stitch by knitting 2 together
m1 = increase 1 by picking up loop between stitch just worked and next stitch, from front to back, and knit into the back of this loop.
P or p = purl
p2tog = decrease 1 stitch by purling 2 together
ssk = decrease 1 stitch by slipping 2 stitches purl-wise, then knit slipped stitches together
st or sts = stitch or stitches
st st = stockinette stitch WS = wrong side

Tuesday, November 18, 2014

change of pace

Thanks for joining me! Are you comfortable? Have you got a nice cup of tea or coffee, or maybe some hot chocolate? I have a bunch of news to share with you.

First, I recently updated my much-loved Owl Tuque pattern. It now includes 6 sizes, from newborn to adult large, so you can knit one for anyone on your gift list. The pattern works well in a variety of yarns, as long as you choose a solid or heathered colour that isn't too dark. I knit one for myself from Cascade Eco-Duo (undyed wool/alpaca) and I get compliments on it all the time!

Yes, that's me. It's hard to photograph a hat on your own head.

Second, I had another pattern published in Knit Now magazine last week: Ursula the Polar Bear. I took advantage of the different venue to try something a little different. She's knit all in the round, and while her shape is a bit unusual, she's really very cuddly! Plus, her cozy red pullover is the perfect attire for this cold season. If your local shops carry the magazine, it comes with the yarn to make her. 
Hi!

Third, I have a new pattern coming soon, hopefully next week! As many of you probably guessed, the new design is for a yeti and big-foot (sasquatch), with a couple of really cute accessories. They look quite different from my other designs, but are still a fairly easy knit. You make the toy with chunky/bulky yarn on 5 mm needles, so the knitting goes really fast. Even the assembly is somewhat easier than my usual toys.

Buddies :)

I've also started work on a little holiday pattern, which will be offered free here. That should be ready around the beginning of December. If you can't wait, try one of my patterns from previous years: mini pookies, inuk and seal, or holiday mice.

You need to knit these, right?

And about some more personal news: my older son, Lev, started kindergarten this Fall. He loves school, and seems to be doing well so far. However, his new schedule and the demands of school have reduced the time I have to work. In addition, I've decided that my younger son, Kyr, would benefit from some extra time at home with me (and maybe I want to enjoy these years before he goes off to school too). So he's only attending pre-school 3 days a week now. Both of these together mean that I had to rethink what I want to do, regarding work on new designs, blog posts, tutorials, and everything else that goes into keeping Fuzzy Mitten going. 

My boys

So, once this year's holiday pattern is published, the pace of things is going to change over the next year and a half. I've decided to use this time to work on a longer-term project I've had in mind for a while: a third self-published collection of patterns. This will (mostly) free me from the pressure of deadlines, as well as allowing me to share my work with you as it progresses. The book will feature my Scraps Chaps designs, which have always been some of my favourites. The original three will get an update, I'll add 3 more animals to the 9 already published, and I'll design a range of outfits and accessories for the toys to wear. I hope you're as excited about this as I am!

Has it really been almost 6 years since I made these guys?

While the book will be my main project over the next 18 months, occasionally there will be new designs to anticipate. My work for Knit Now magazine will continue, with a new pattern every few months. As well, there will be another mystery knit-along next Spring. The mystery knit-alongs have become one of my favourite parts of this job, and I'm really looking forward to doing another one!

I hope you can understand that this change of pace means I will have less time to write here. When I started this blog several years ago, so many crafty people were writing about what they were making, their family life, their thoughts and challenges and dreams. But blogging has changed since then - I don't feel like I fit into this new version, and it's too hard for my little voice to be heard. I'll still write when I have exciting news, or a new tutorial, but I think that's it. However, I do hope to make time to reorganize things, so it's easier for you to find the most useful posts. If you want any other news about what I'm up to, try following me on Facebook, Twitter, or Instagram.

It's been lovely, all of you, and I hope you stick around to see where this new path takes me.

Wednesday, October 29, 2014

recipe - autumn squash stew

As soon as the weather gets cooler, all my husband wants to eat is soup! Although he's not picky, I like some variety to our suppers, so I have a pretty good collection of recipes that I can pull out as the season changes. This stew is very easy, tasty, and filling, making it one of our favourites. It's also a nice change from the more common spicy or curry squash soups.

Autumn Squash Stew

Makes about 4 adult servings
Prep and cooking time: approx. 45 minutes

Ingredients
2 lbs squash
2 medium yellow potatoes
2 medium tomatoes
2 tbsp olive oil
4 cups vegetable or chicken broth
2 bay leaves
4 fresh sage leaves (or 1 tsp dried sage)
1/4 cup dry white wine (if you want to be fancy)
chili flakes, salt, pepper (to taste)

A note about selecting squash: most grocery stores now carry a variety of squashes, and farmer's markets will have even more. I like this stew best with 2 kinds of squash in it, so it has more depth of flavour. Usually I'll pair a paler, milder tasting squash (such as acorn or delicata) with a darker, stronger squash (such as butternut or sugar pumpkin). Whichever you like, make sure you pick ones with thinner skins that can be peeled.

1. Peel the squash and potatoes, and dice them into bite-sized pieces.
2. Place your soup pot on a medium-heat burner and add the olive oil. Once the oil is warm, add the squash and potatoes. Sauté for about 5 minutes, or until the potatoes just start to turn golden (they may stick a bit to the bottom of the pan, but don't worry, they'll come off later).
3. While the squash and potatoes are cooking, dice the tomatoes. Add them to the pot and sauté for 1 minute.
4. Add the broth and herbs (and wine) to the pot. Also add the chili flakes, if you're using them. Once the soup is simmering, turn the heat to medium-low and cover. Cook for about 15 minutes, until the squash and potatoes are soft.
5. Remove the bay and sage leaves. Transfer about 2 cups of soup to a blender or food processor, and blend until very smooth. Add this back to the pot. Taste the stew, and adjust the seasoning with salt and pepper if needed.

This is a nice lunch on it's own, or make it a complete supper with some sour-dough bread and your favourite cheese.

P.S. I have some knitting news to share with you soon, so check back in a few days!
p.p.s. one of these days I might learn how to take pretty pictures of soup. Until then, don't worry about how it looks, it tastes delicious!